

Silver Sport Transmissions 1968-79 Corvette T-5 Kit
By Evan J. Smith
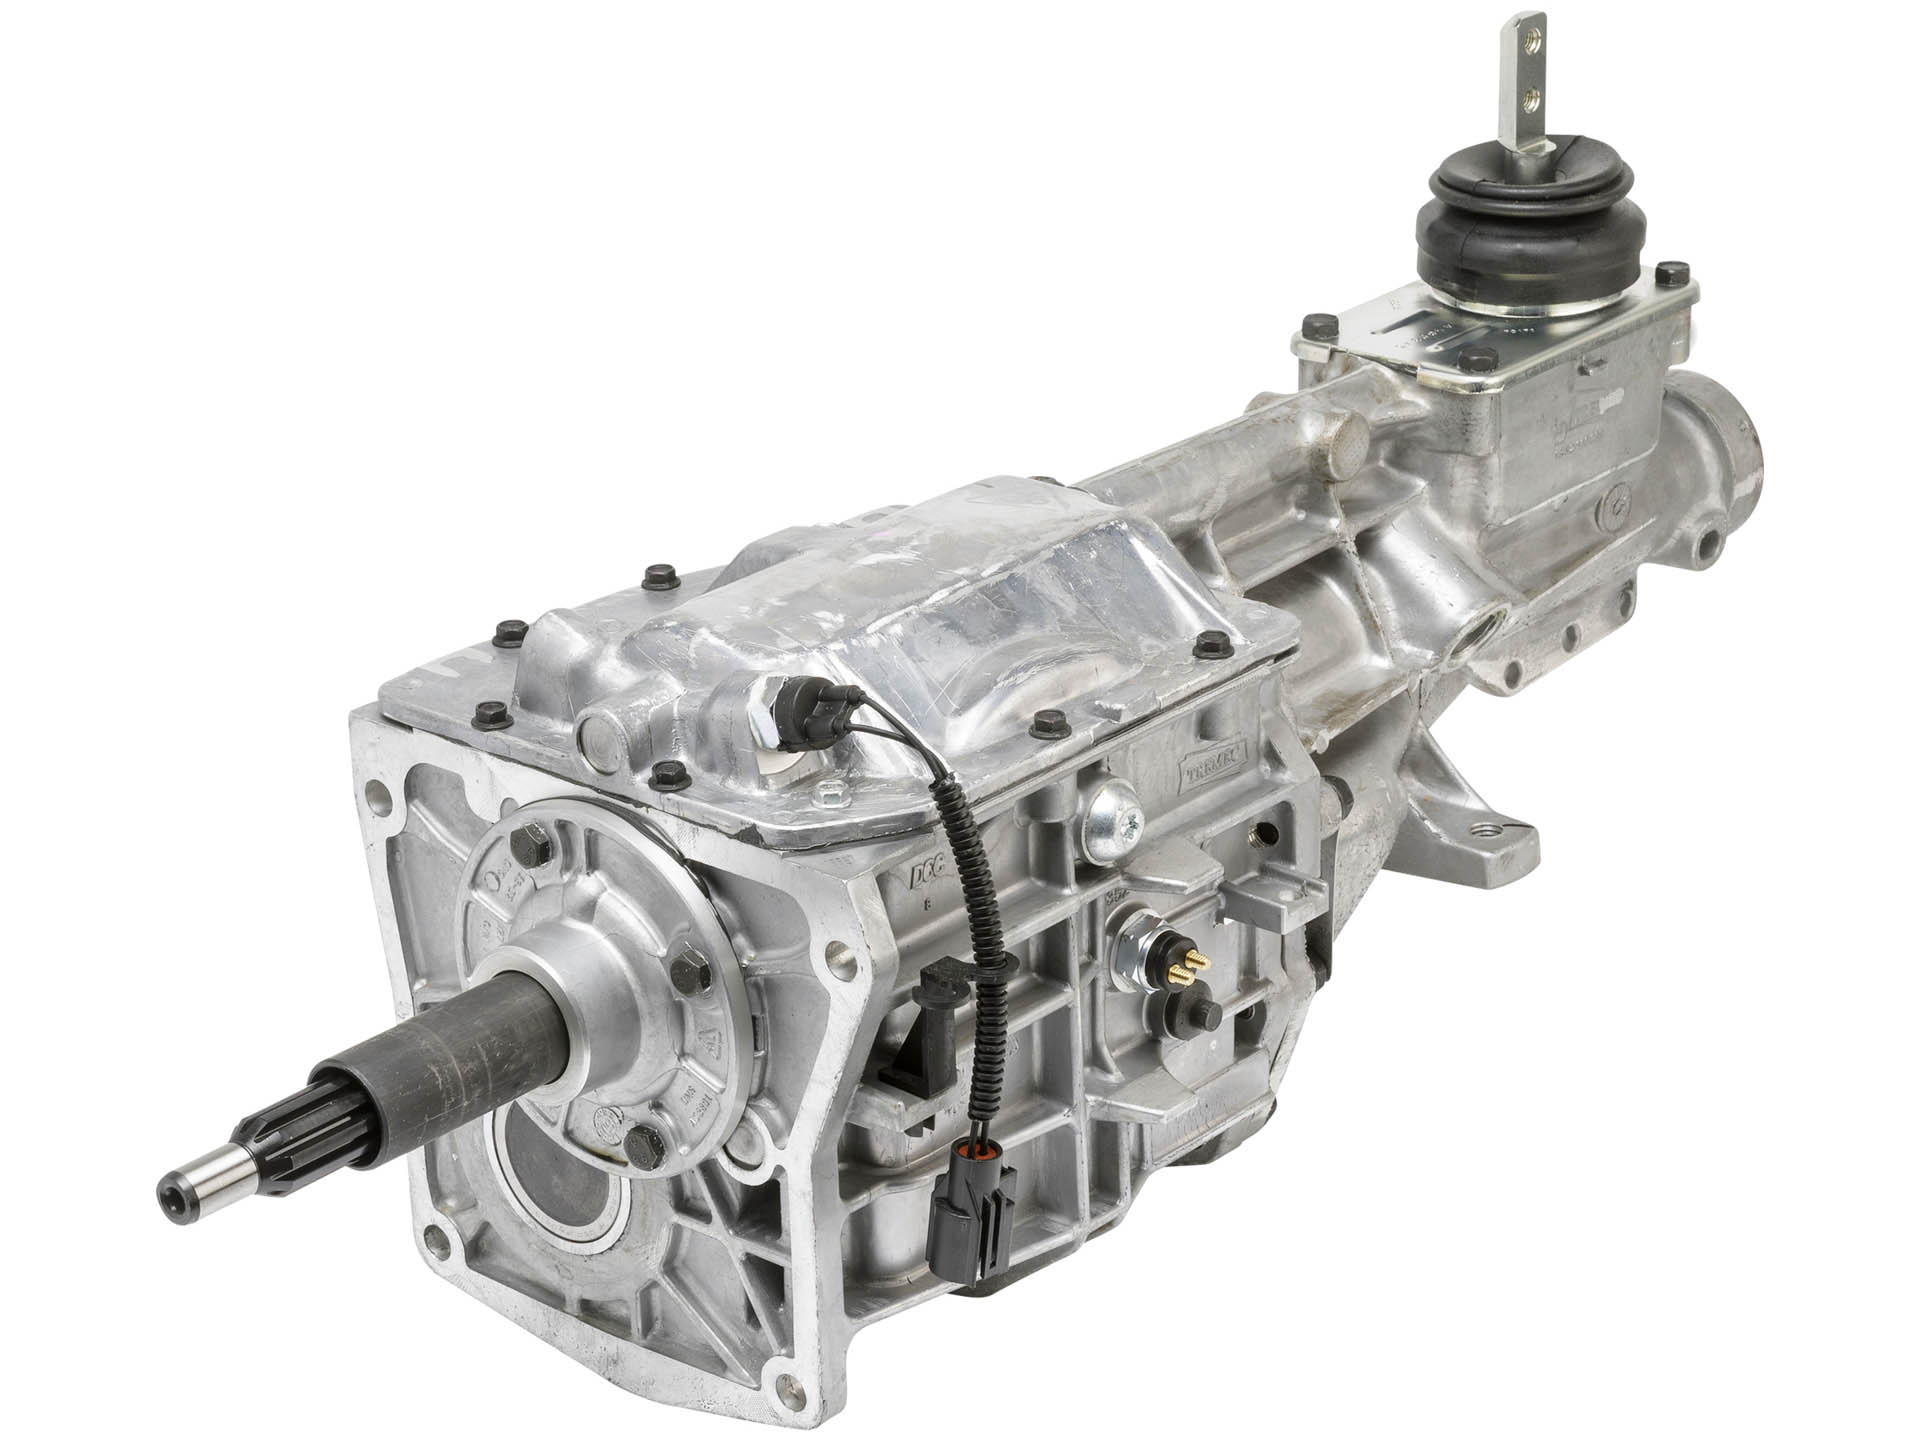
The TREMEC T-5 originally came as OE equipment in Foxbody Mustangs and was a popular overdrive transmission for years in many swap applications. When TREMEC introduced it to the aftermarket, it became an easy choice for early Mustangs with moderate power levels.
The T-5 only has one shifter position, a 10-spline input shaft, and a Ford bellhousing bolt pattern—because of this, the T-5 wasn’t a viable option for other makes or models. While TREMEC’s new 5-speed, the TKX, is highly versatile and a great transmission for a wide range of applications, it’s also more expensive than the T-5.
Silver Sport Transmissions (SST), known for its PerfectFit™ TREMEC transmission kits, tasked the in-house engineering team to create a T-5 kit for 1968-1979 Chevrolet Corvettes to give owners a second, more affordable option for an overdrive 5-speed transmission.
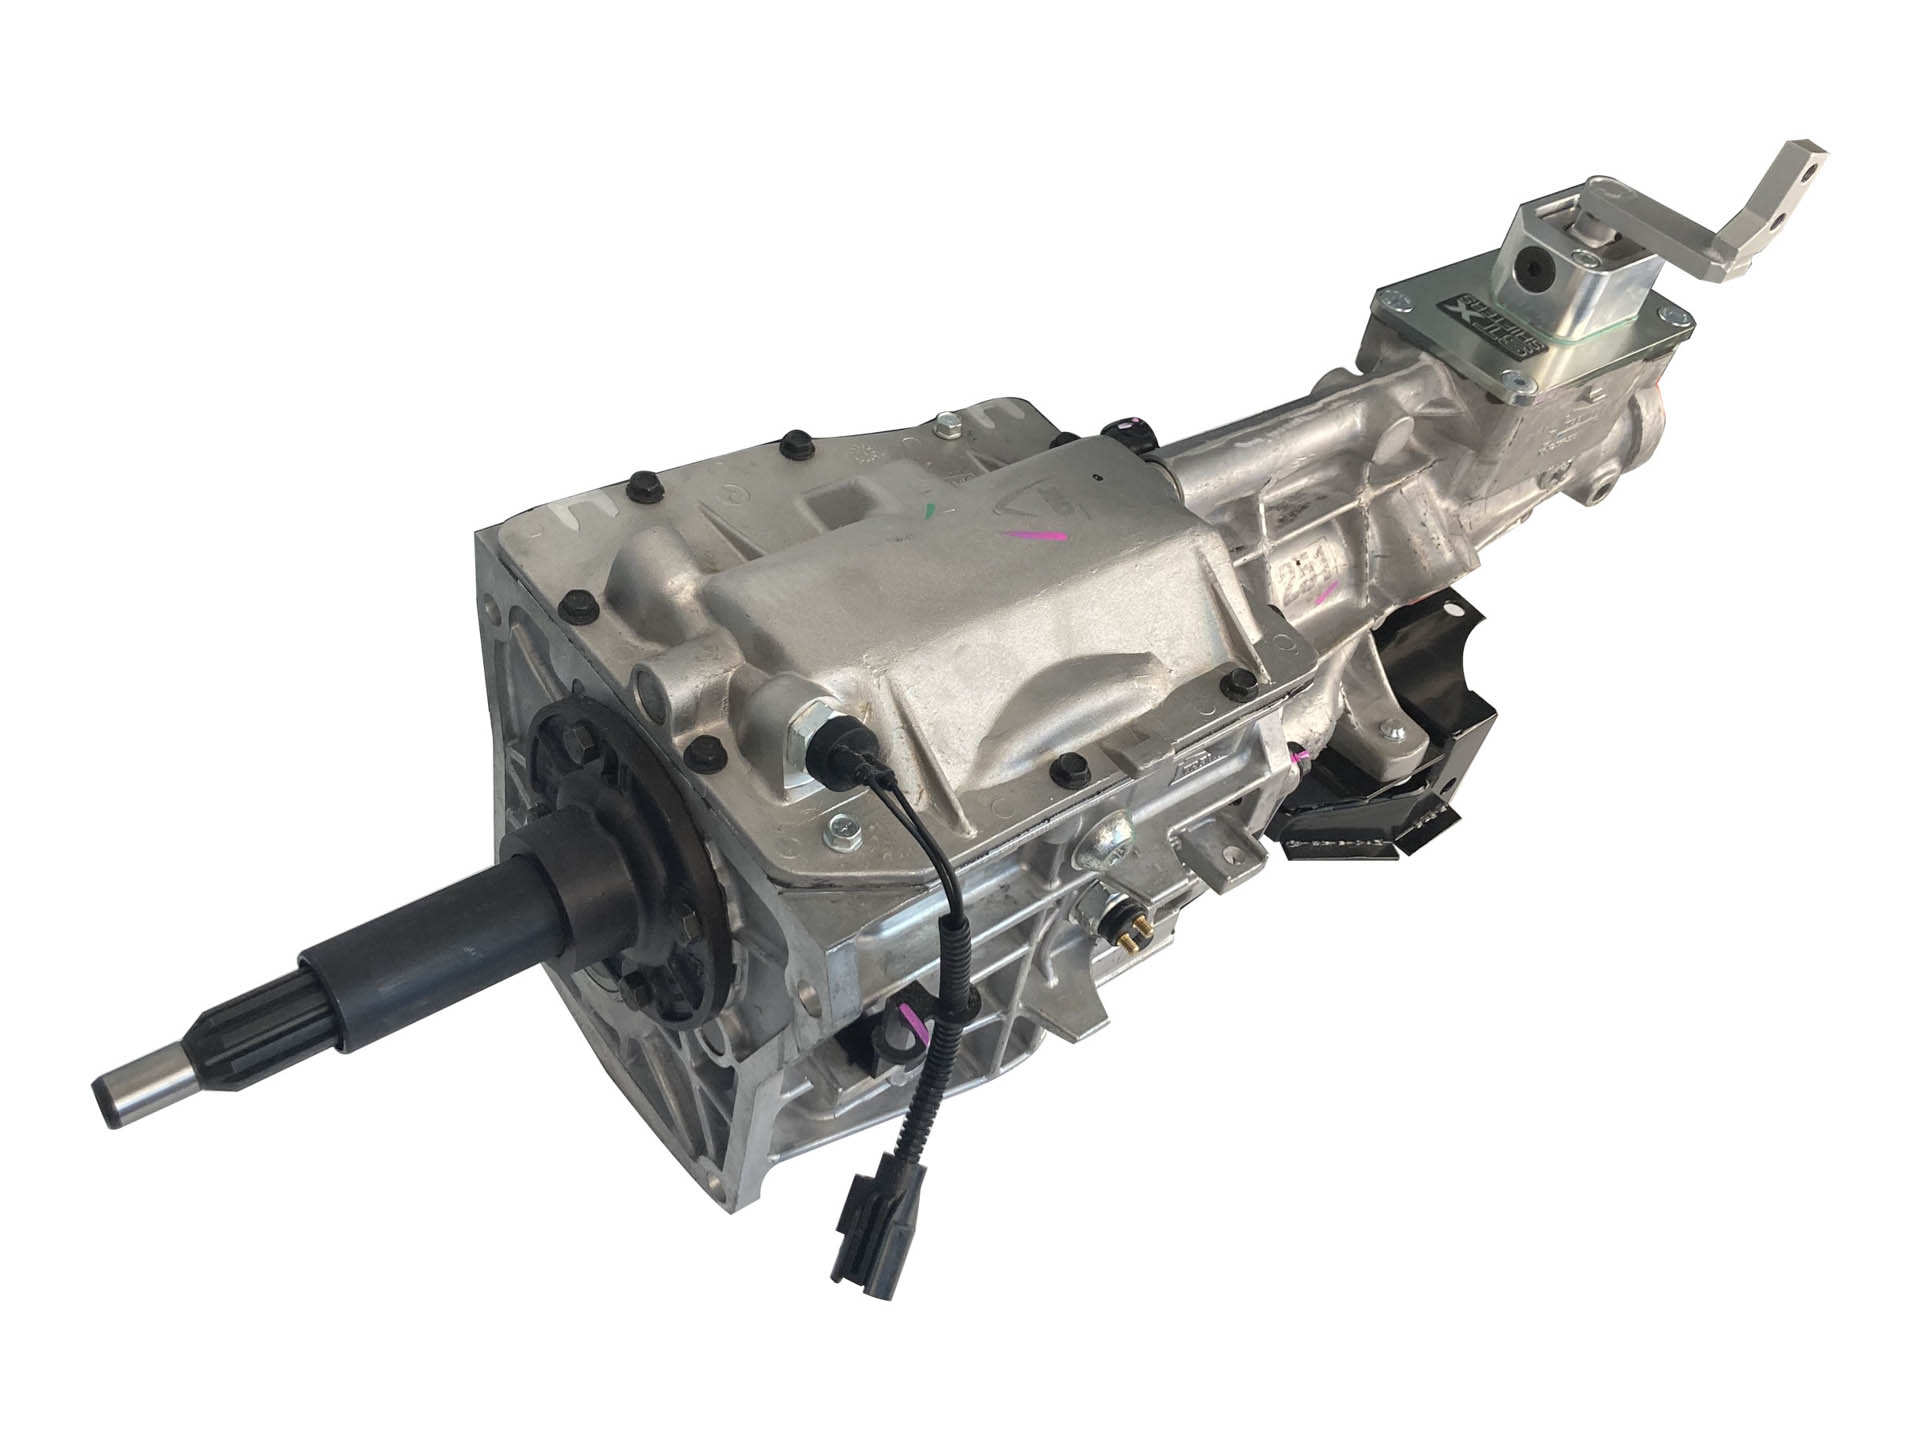
SST’s engineering team started with the library of information they already have on the Corvette and the TREMEC T-5 to determine where the T-5’s shifter position would need to be. With computer models complete, SST built the first TREMEC T-5 with a Corvette STX Shifter® and a transmission perch plate to rest the transmission on the stock crossmember. SST sourced a 1979 Corvette to serve as a research and development vehicle.
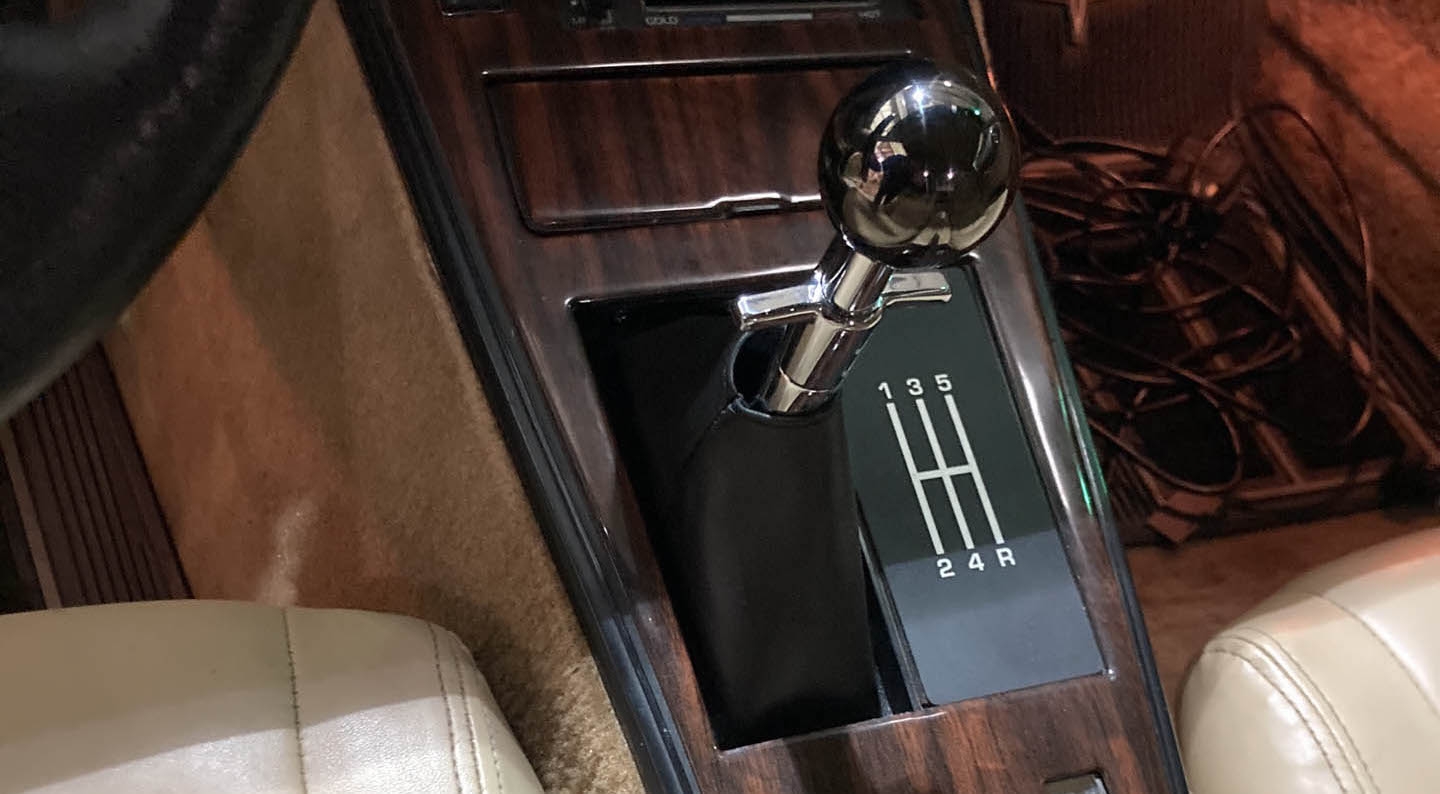
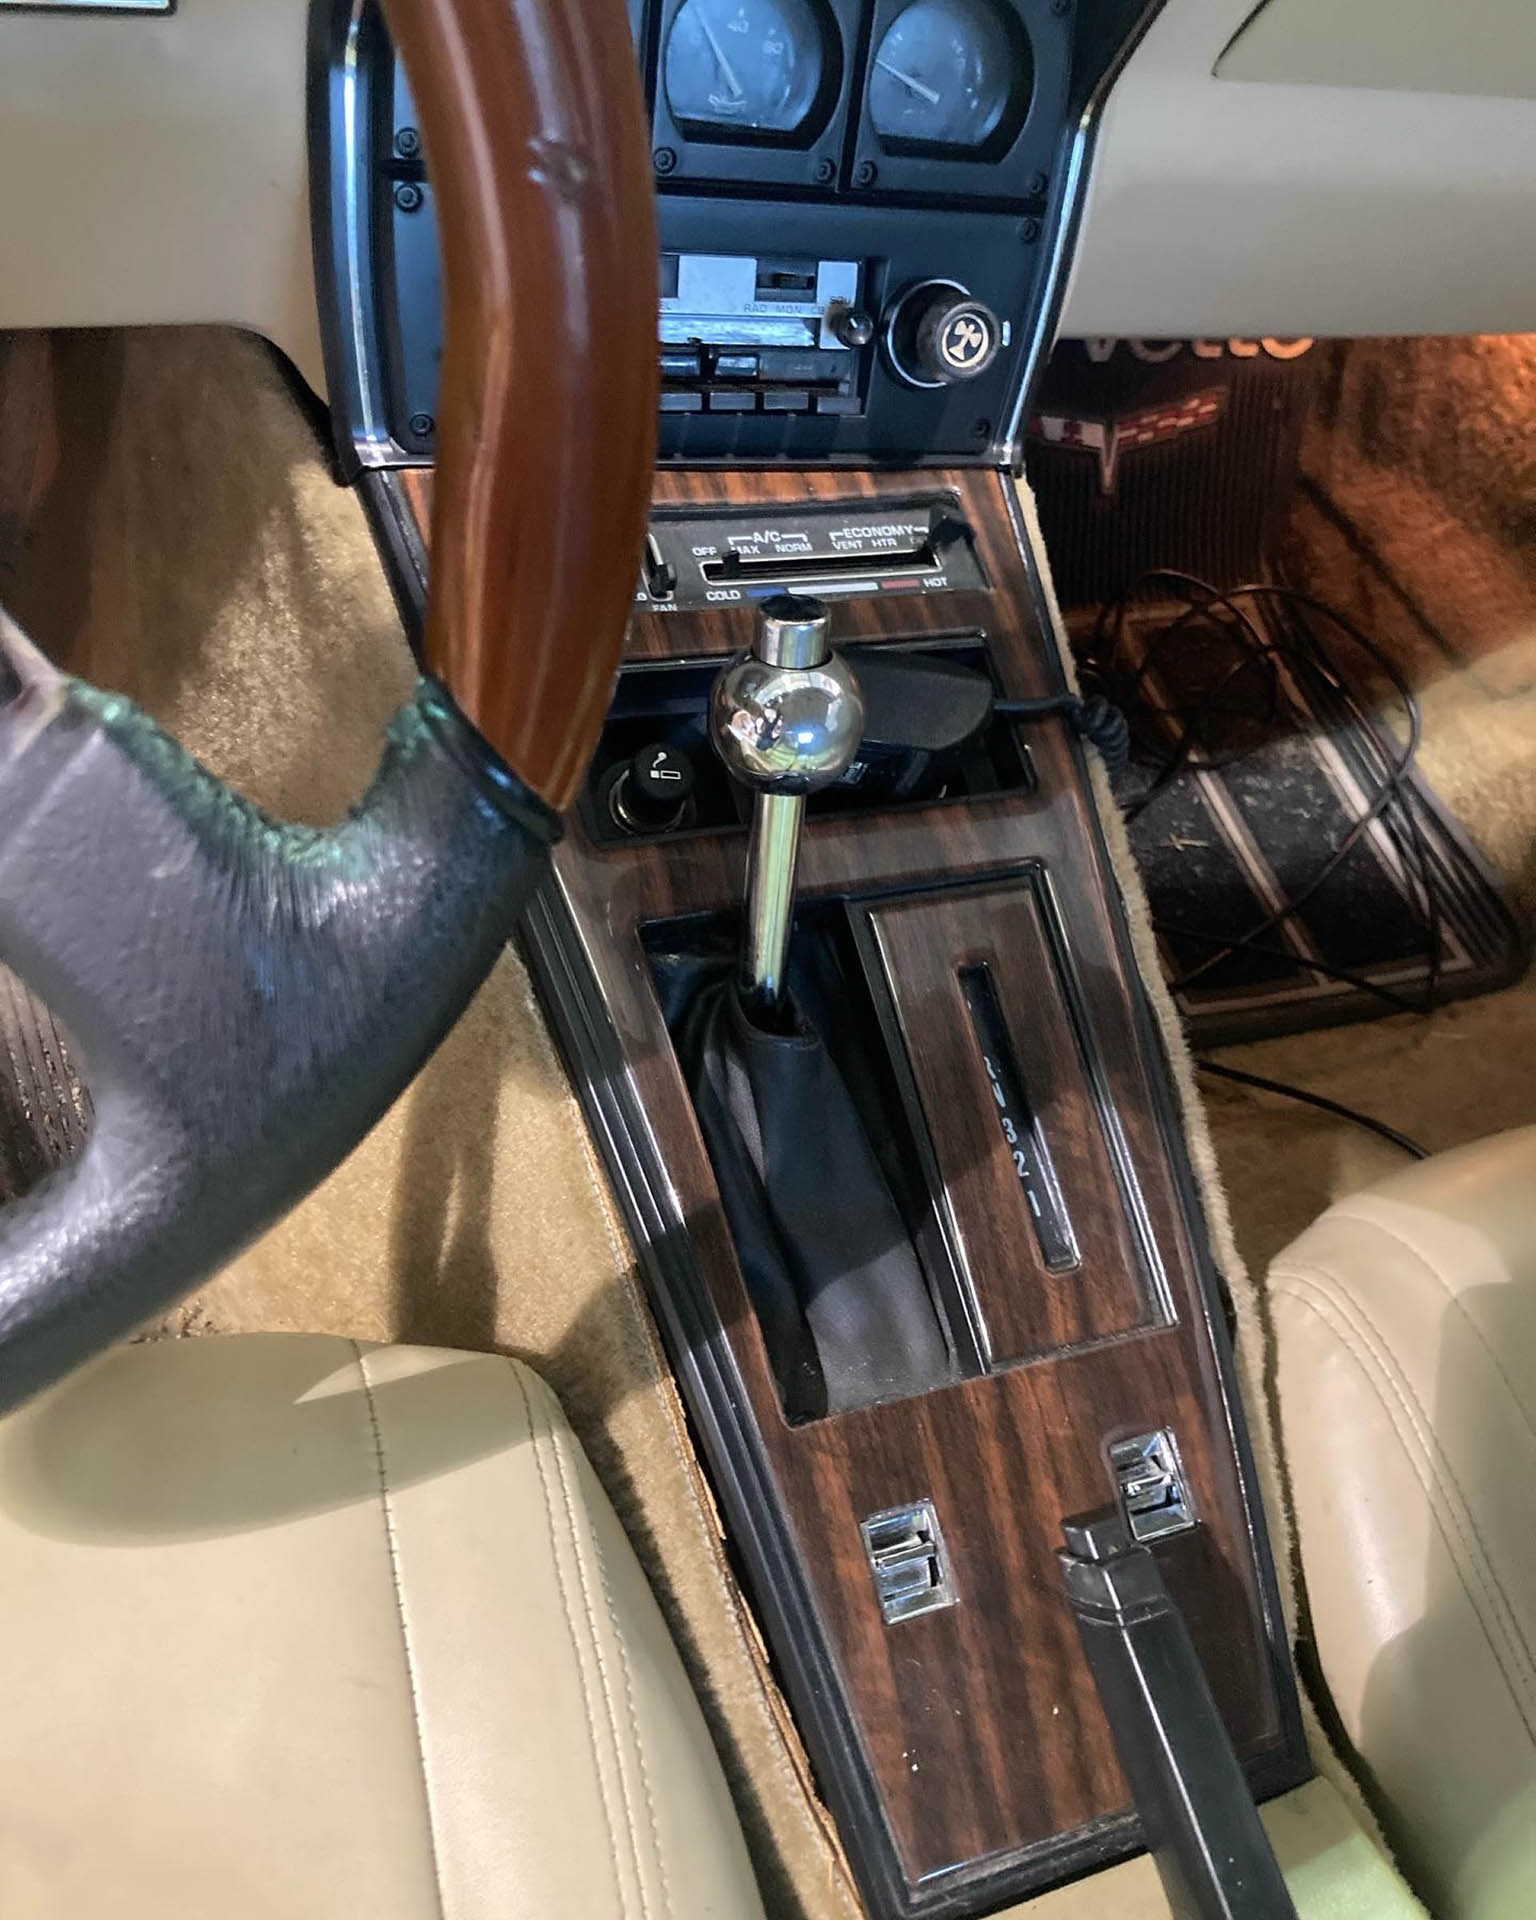
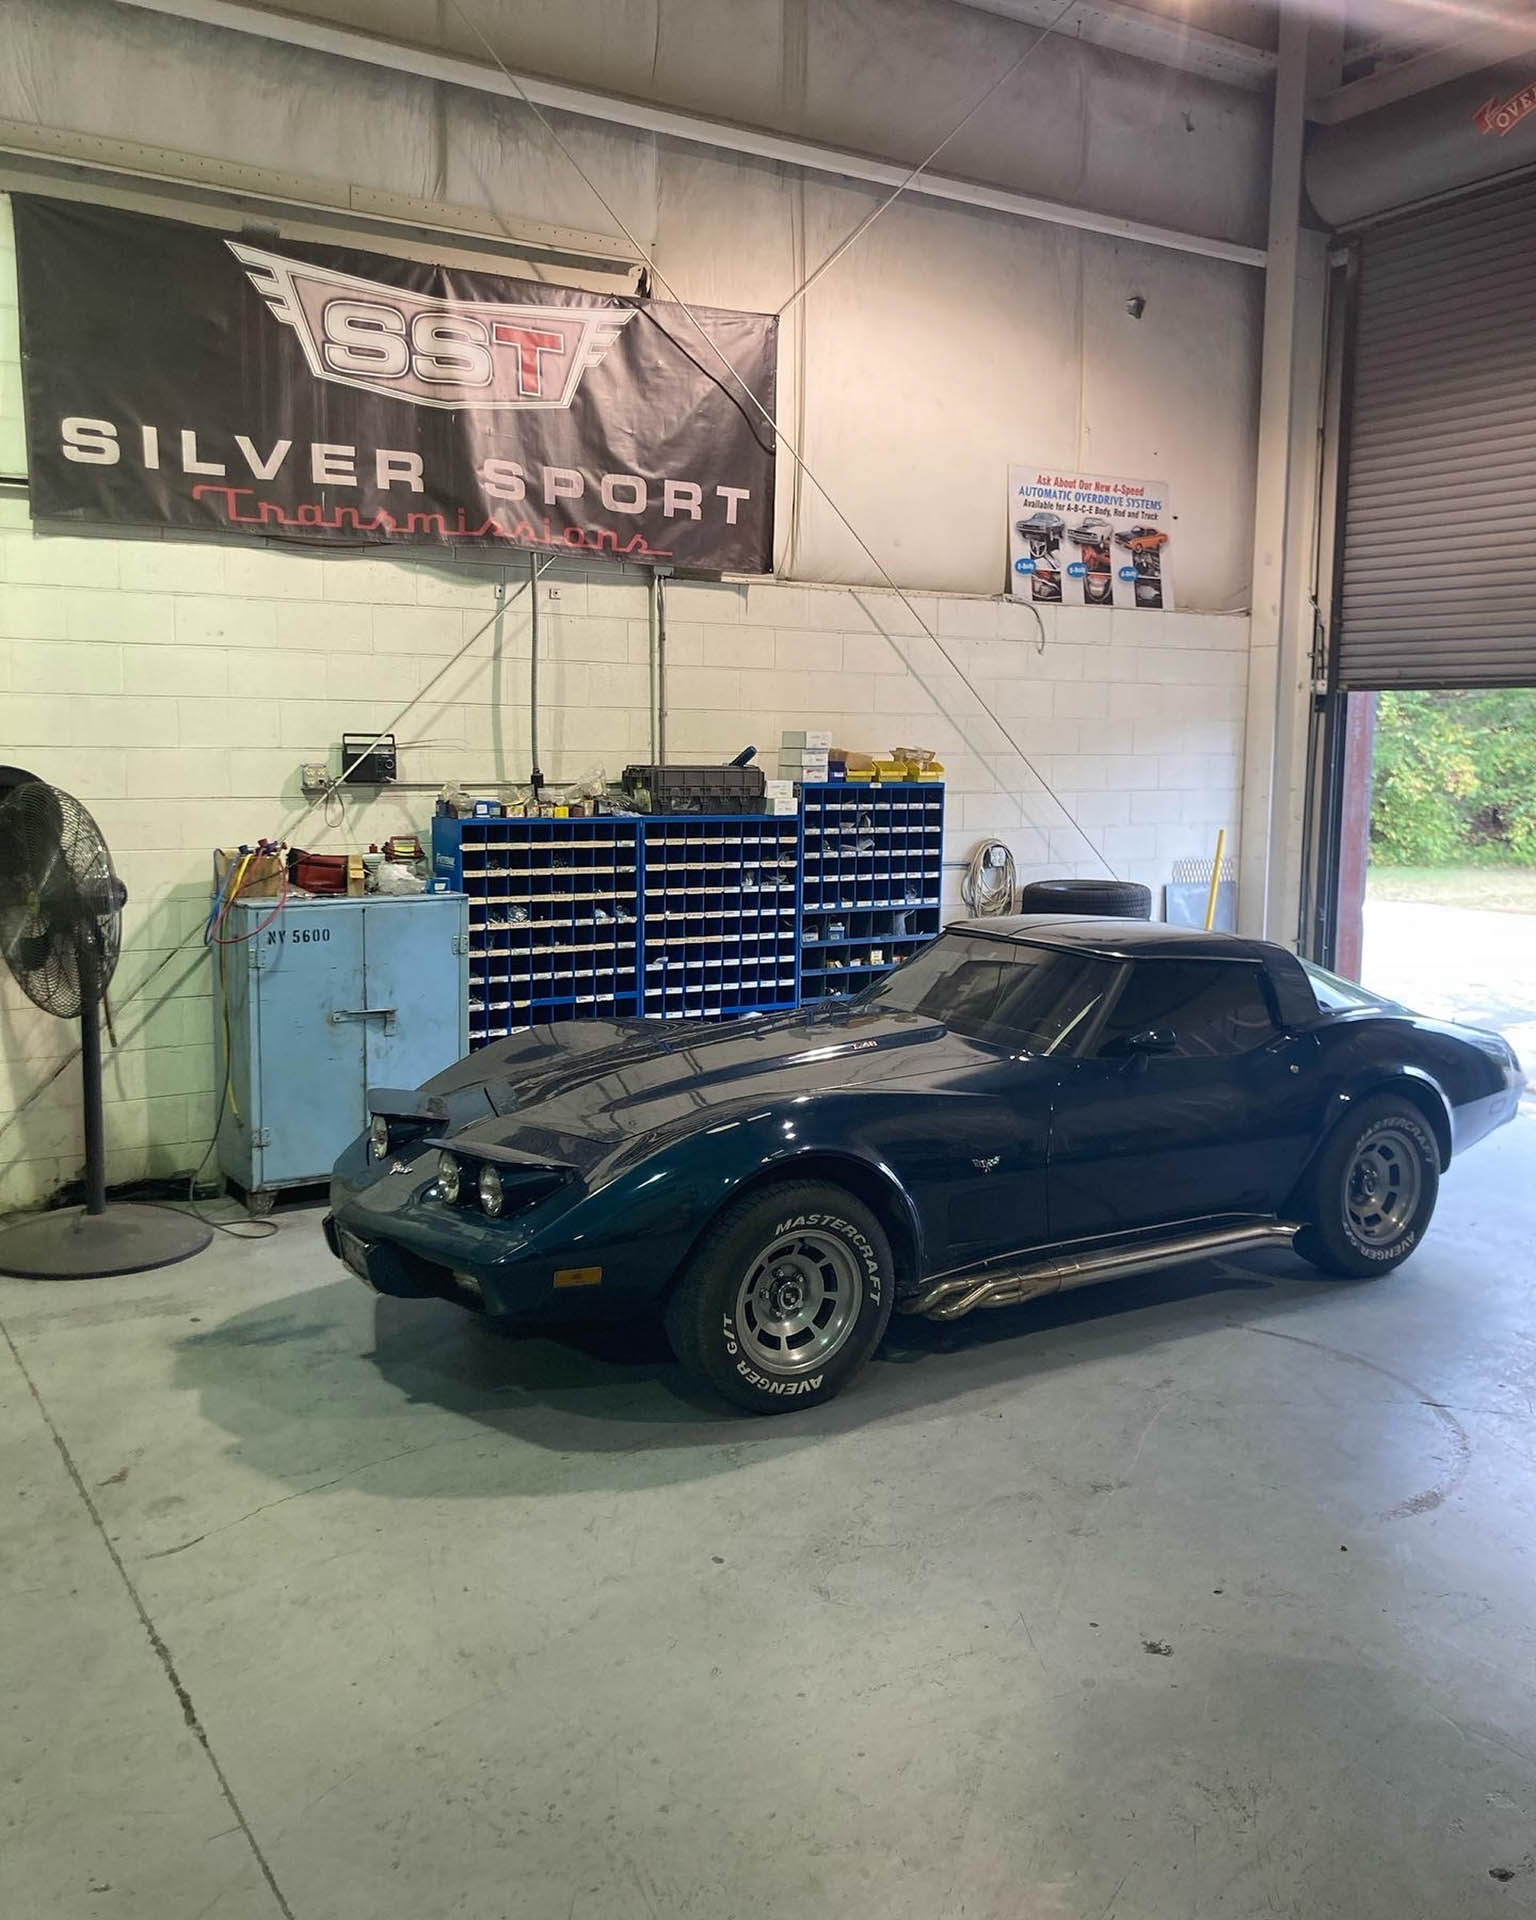
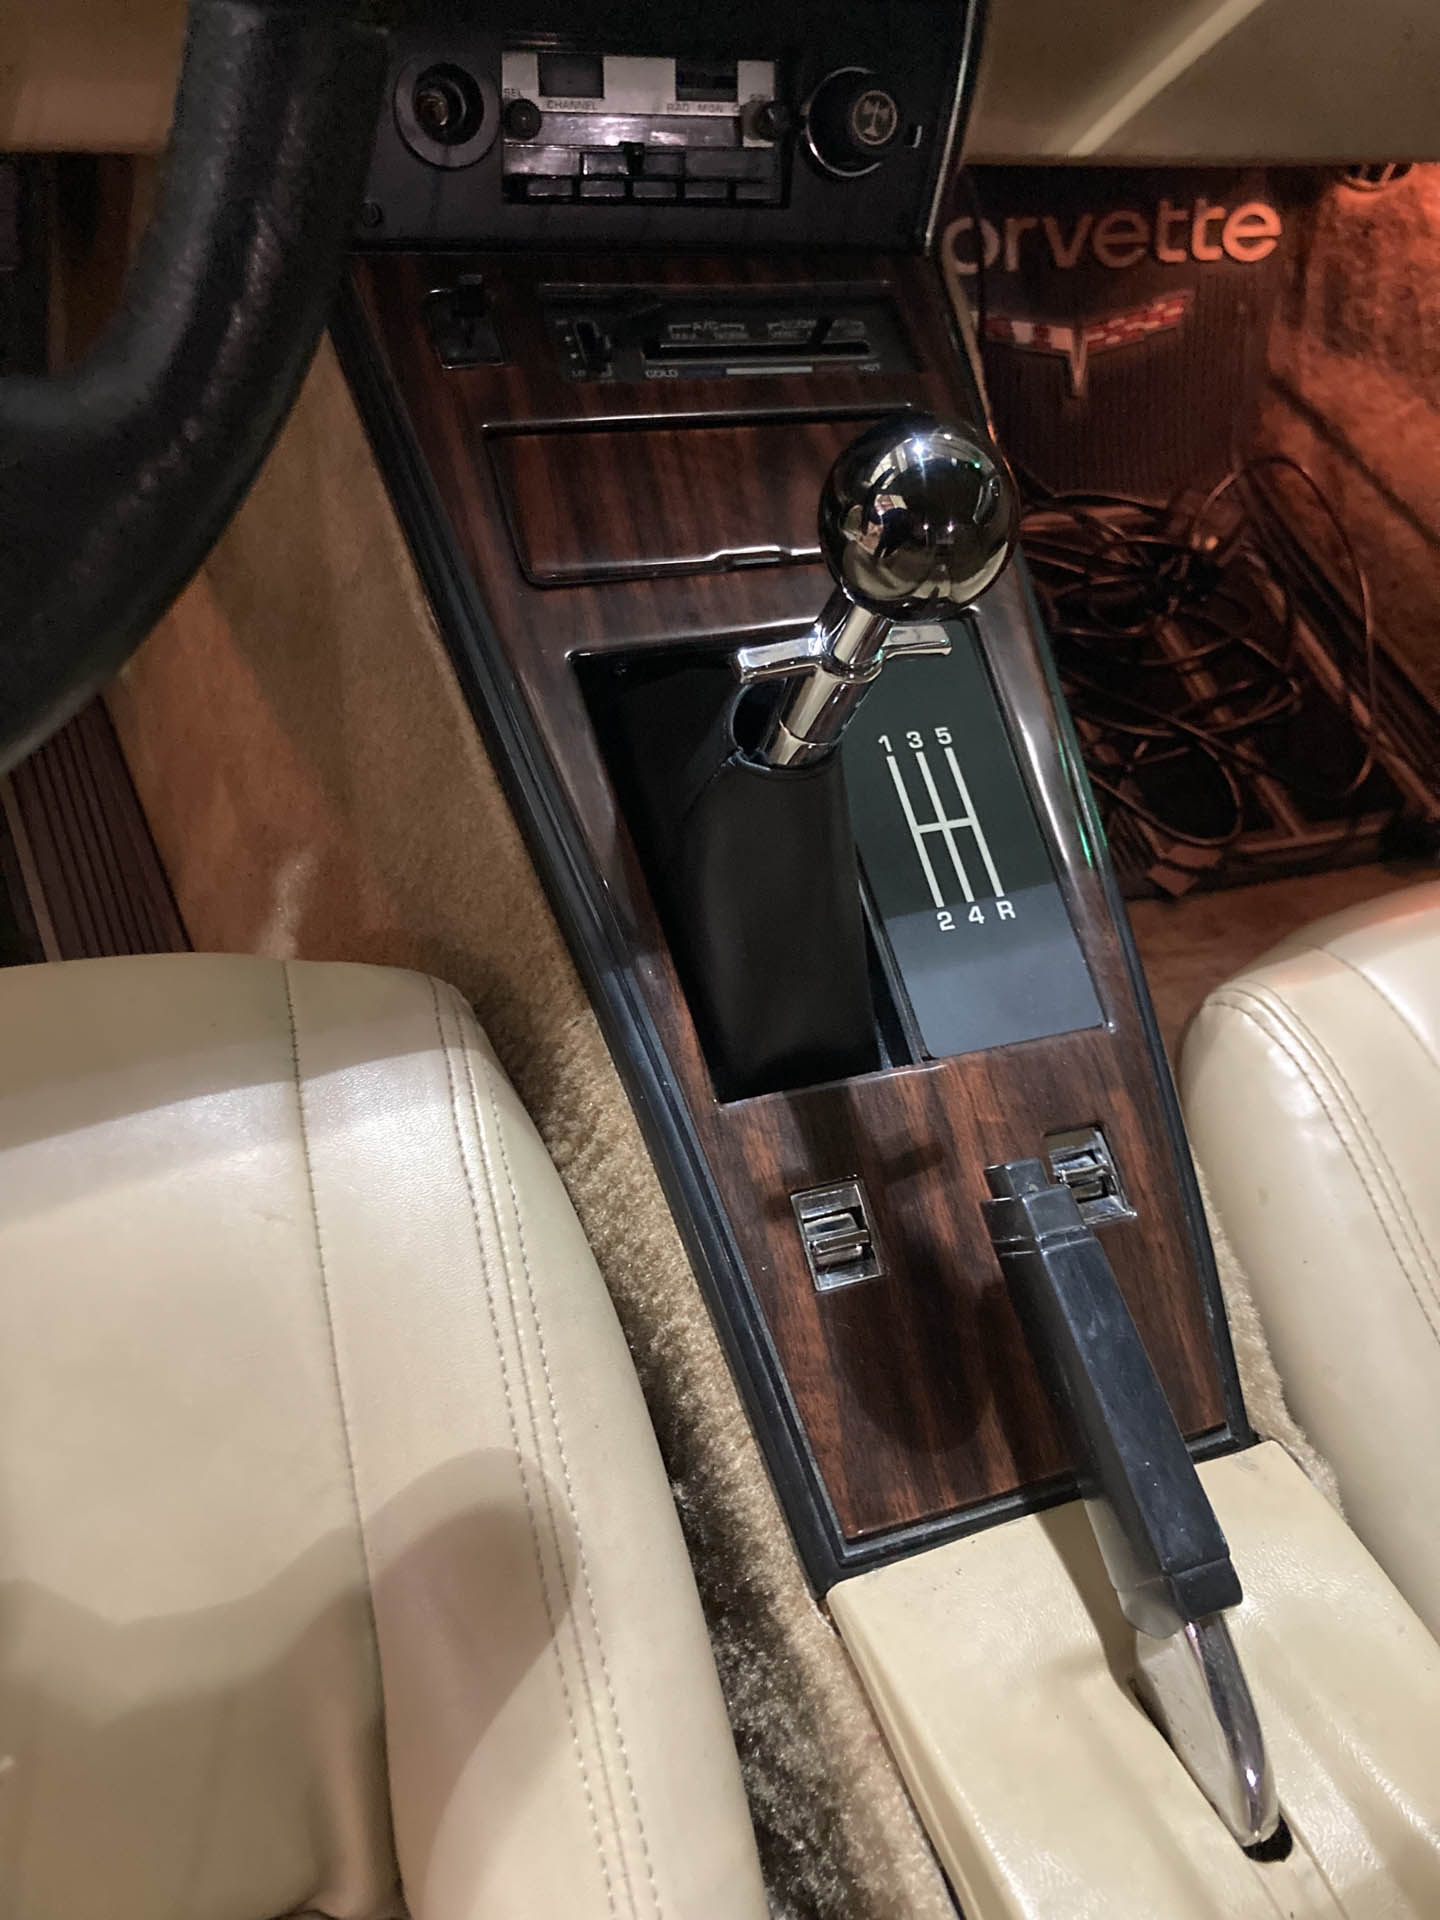
The ’79 Stingray used for this exercise came equipped with an automatic transmission and the plan was to retain the factory console by replacing the automatic gear indicator with a new 5-speed shift plate that is designed to resemble the original 4-speed shift plate.
A replica manual shifter handle will replace the automatic shifter handle. The only hint that a major performance upgrade has taken place will be the extra digit on the shift plate, otherwise the car will look completely stock.
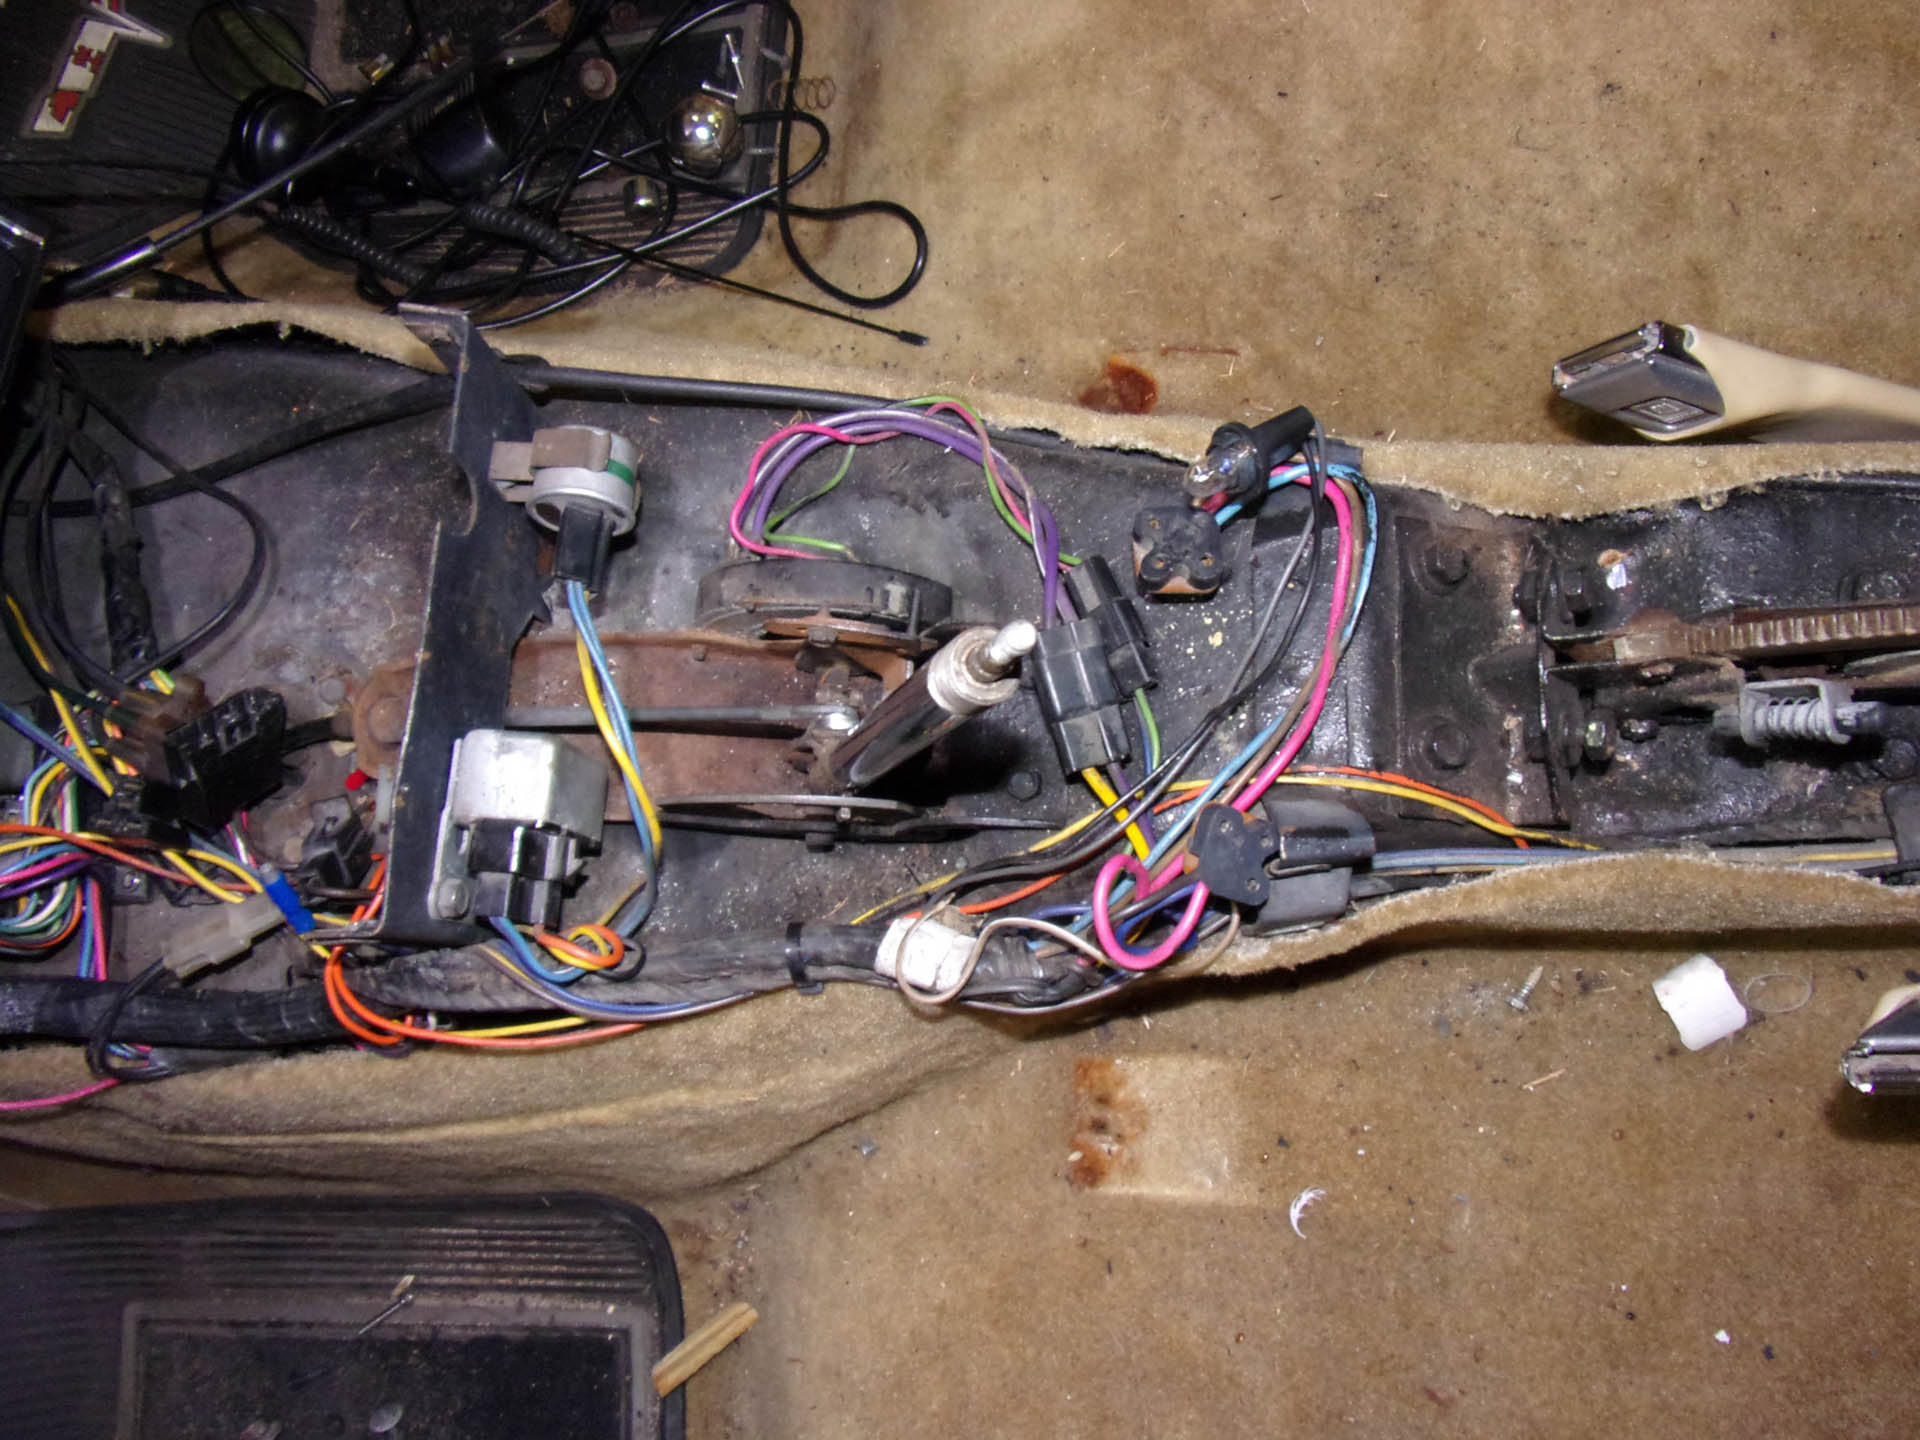
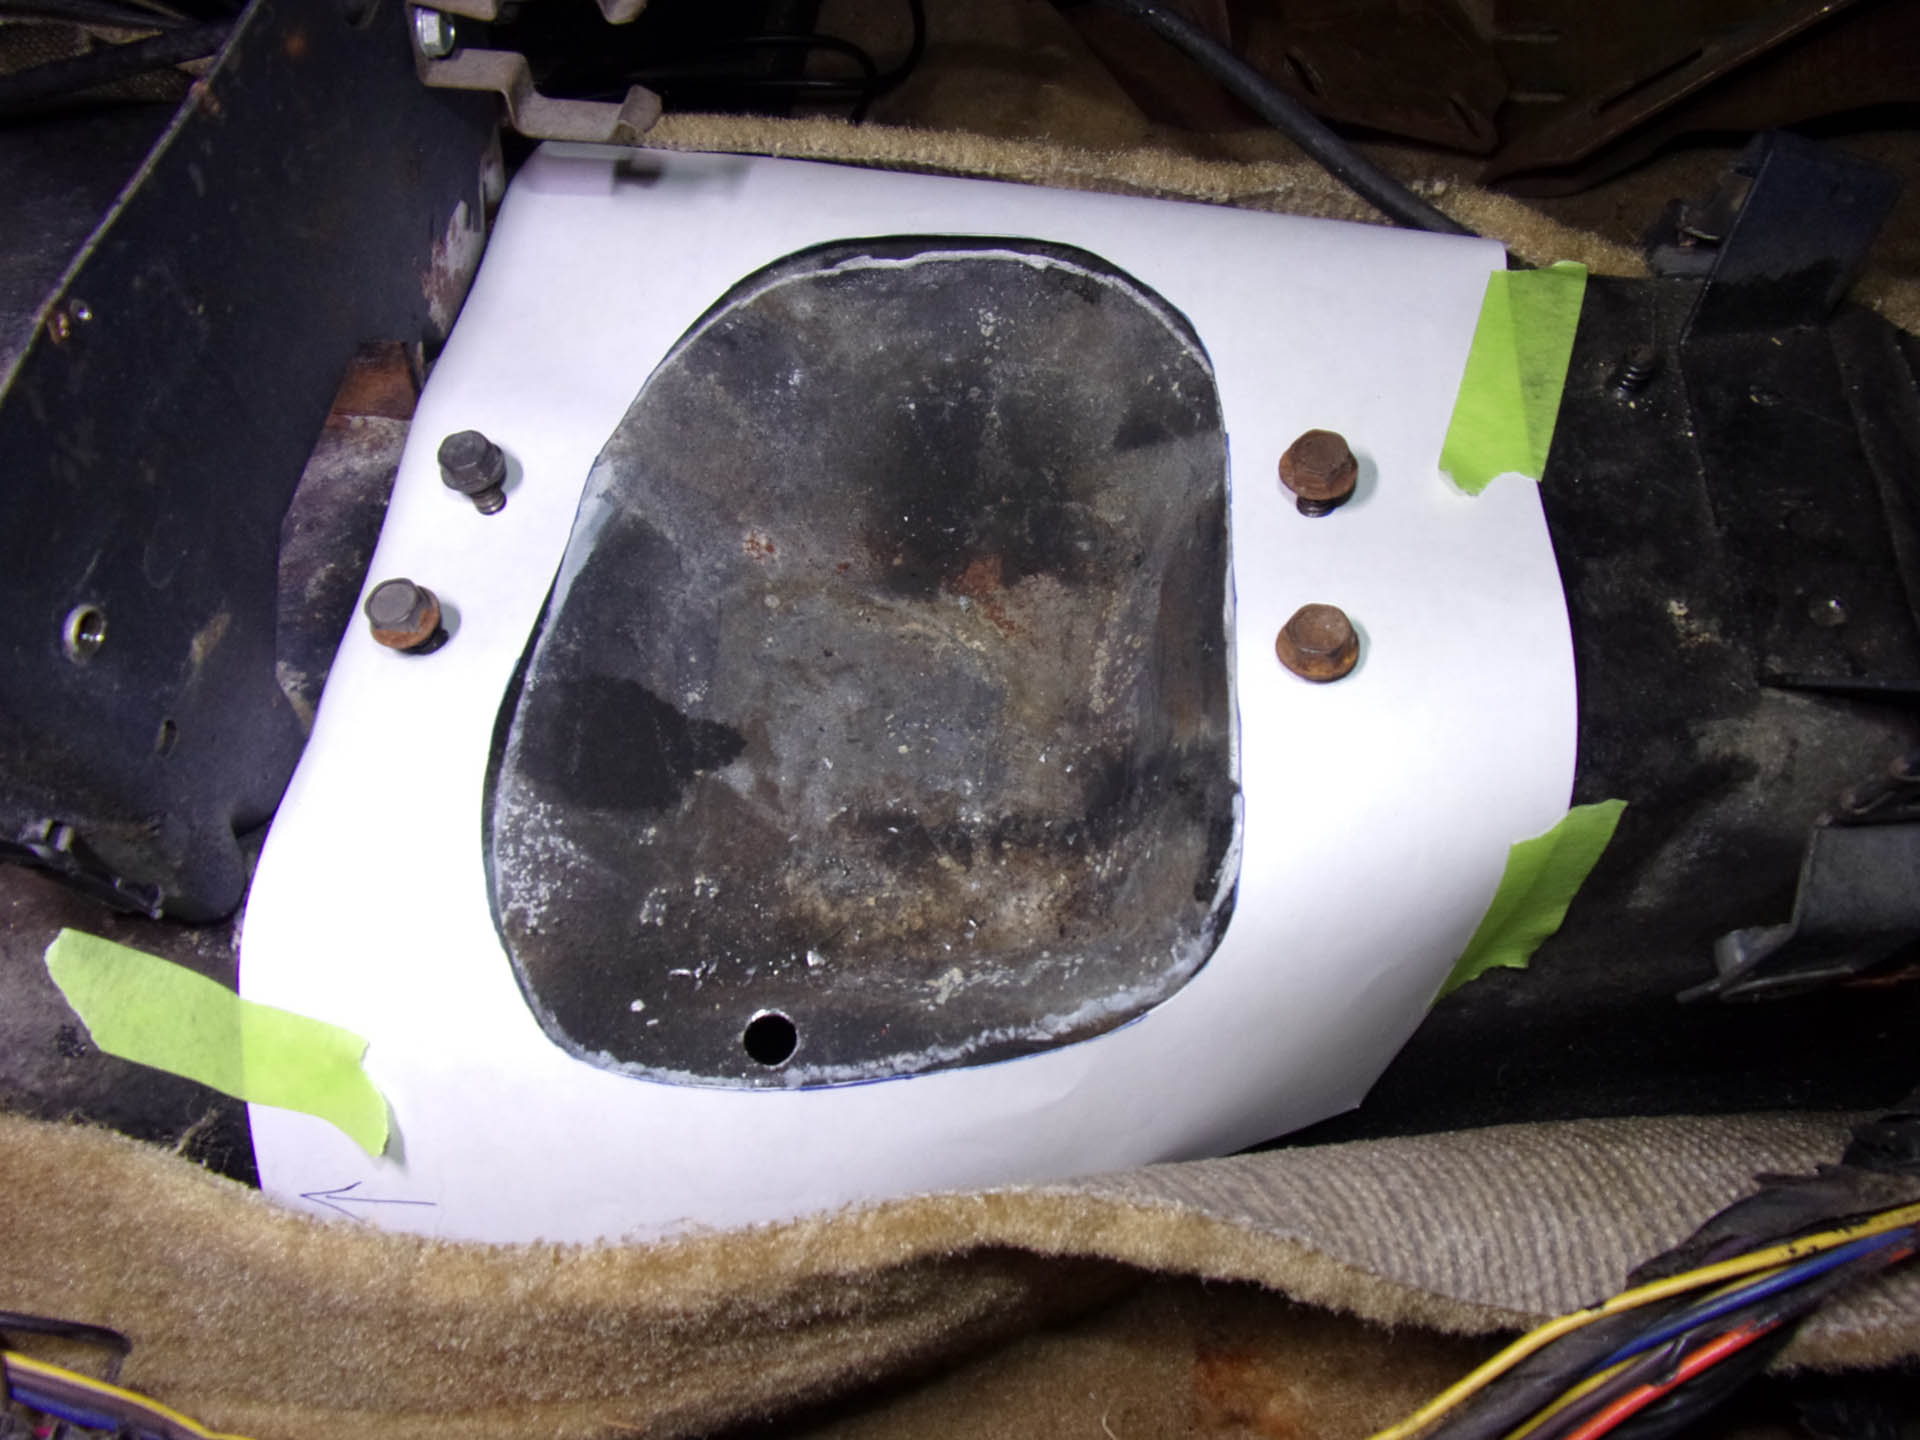
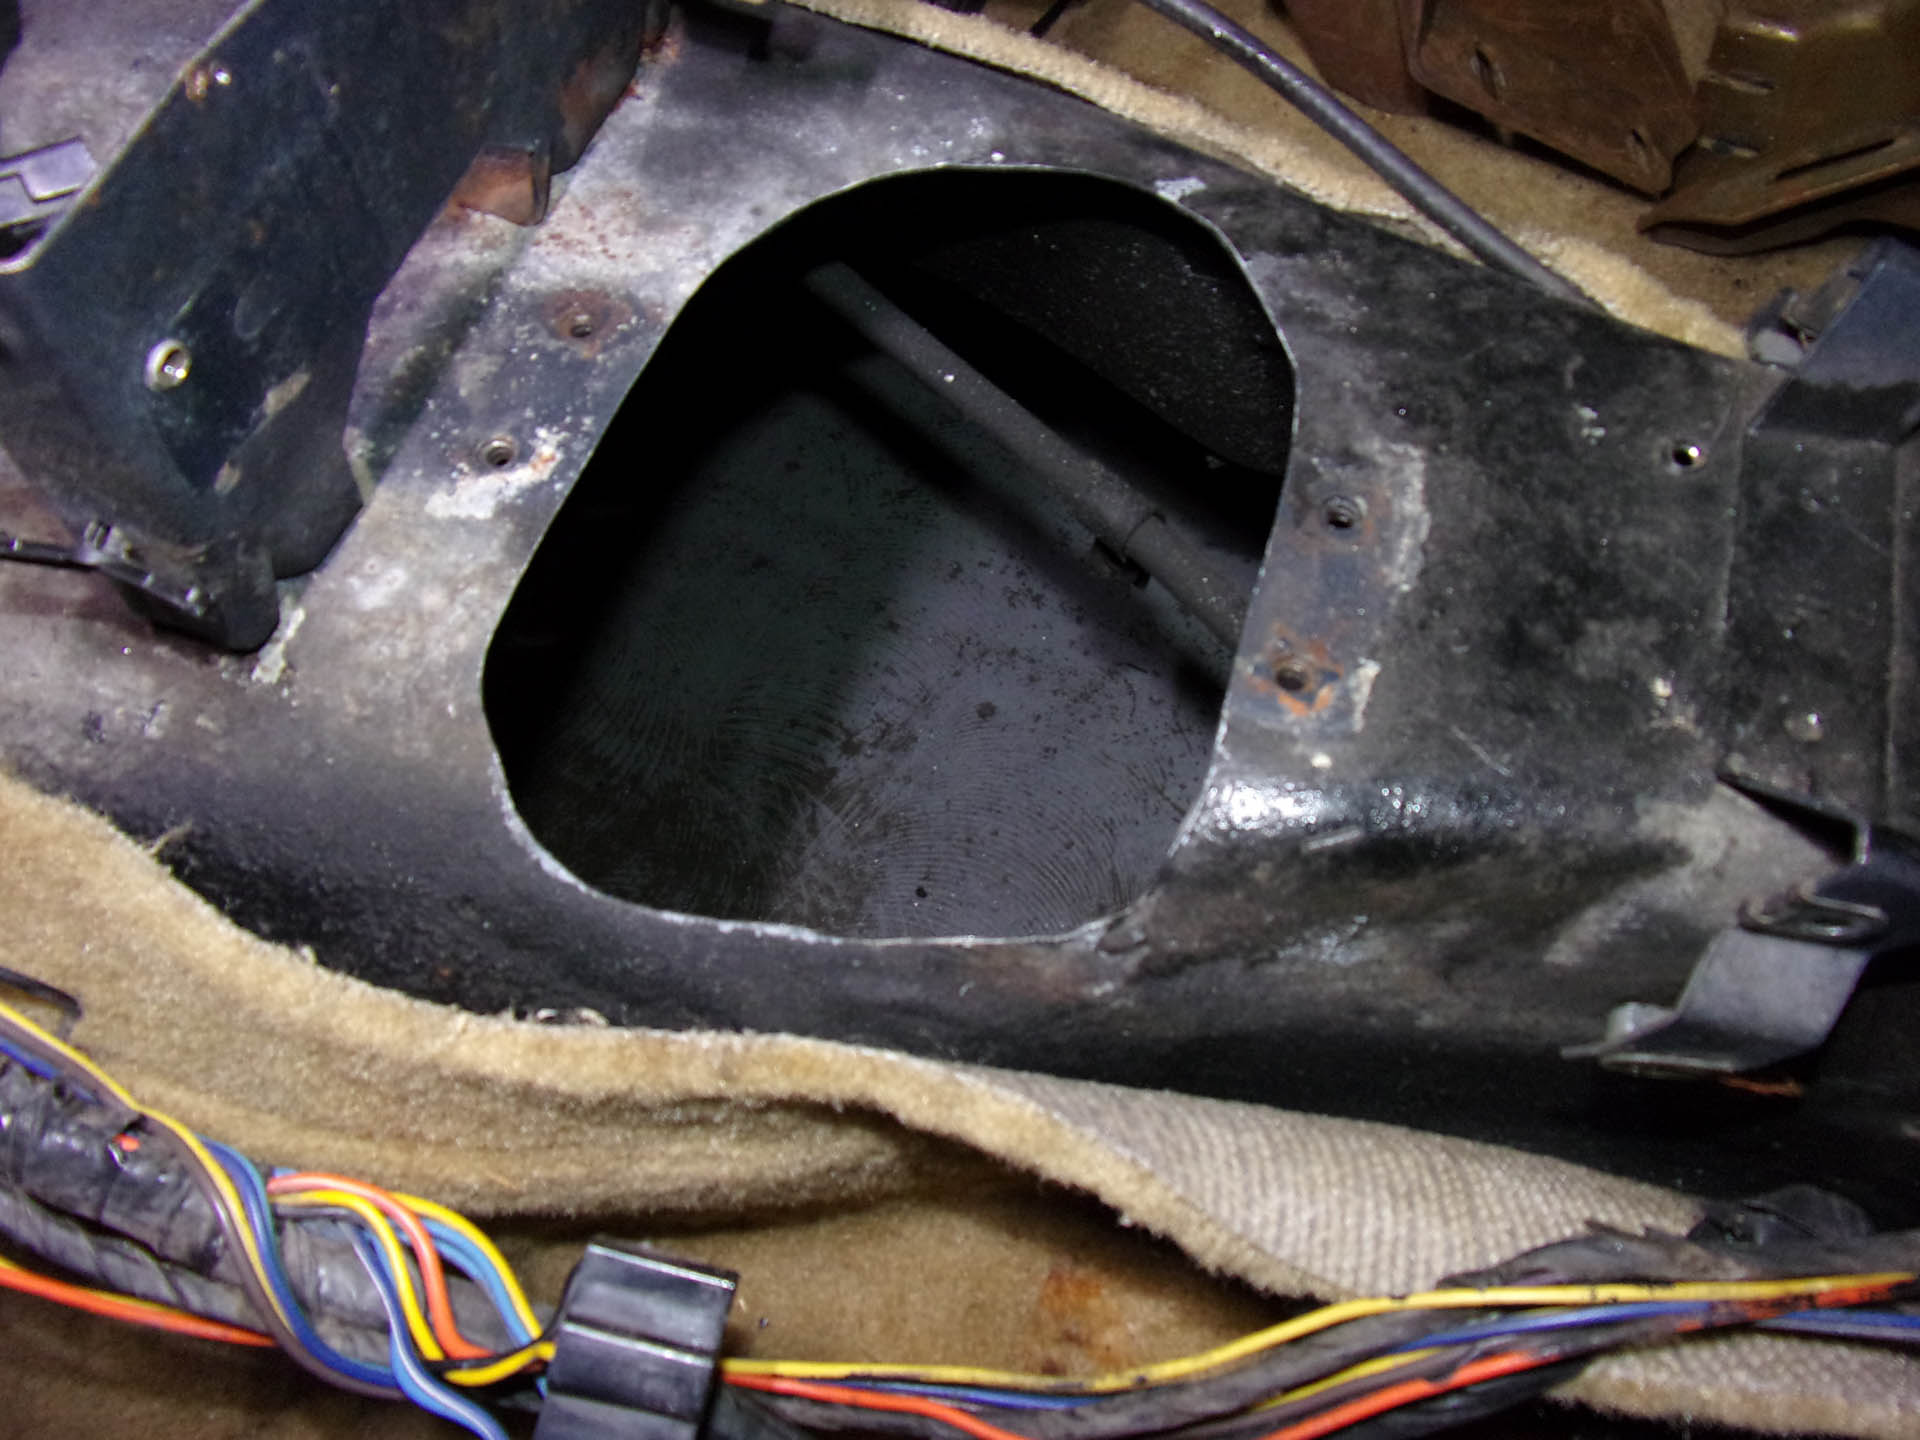
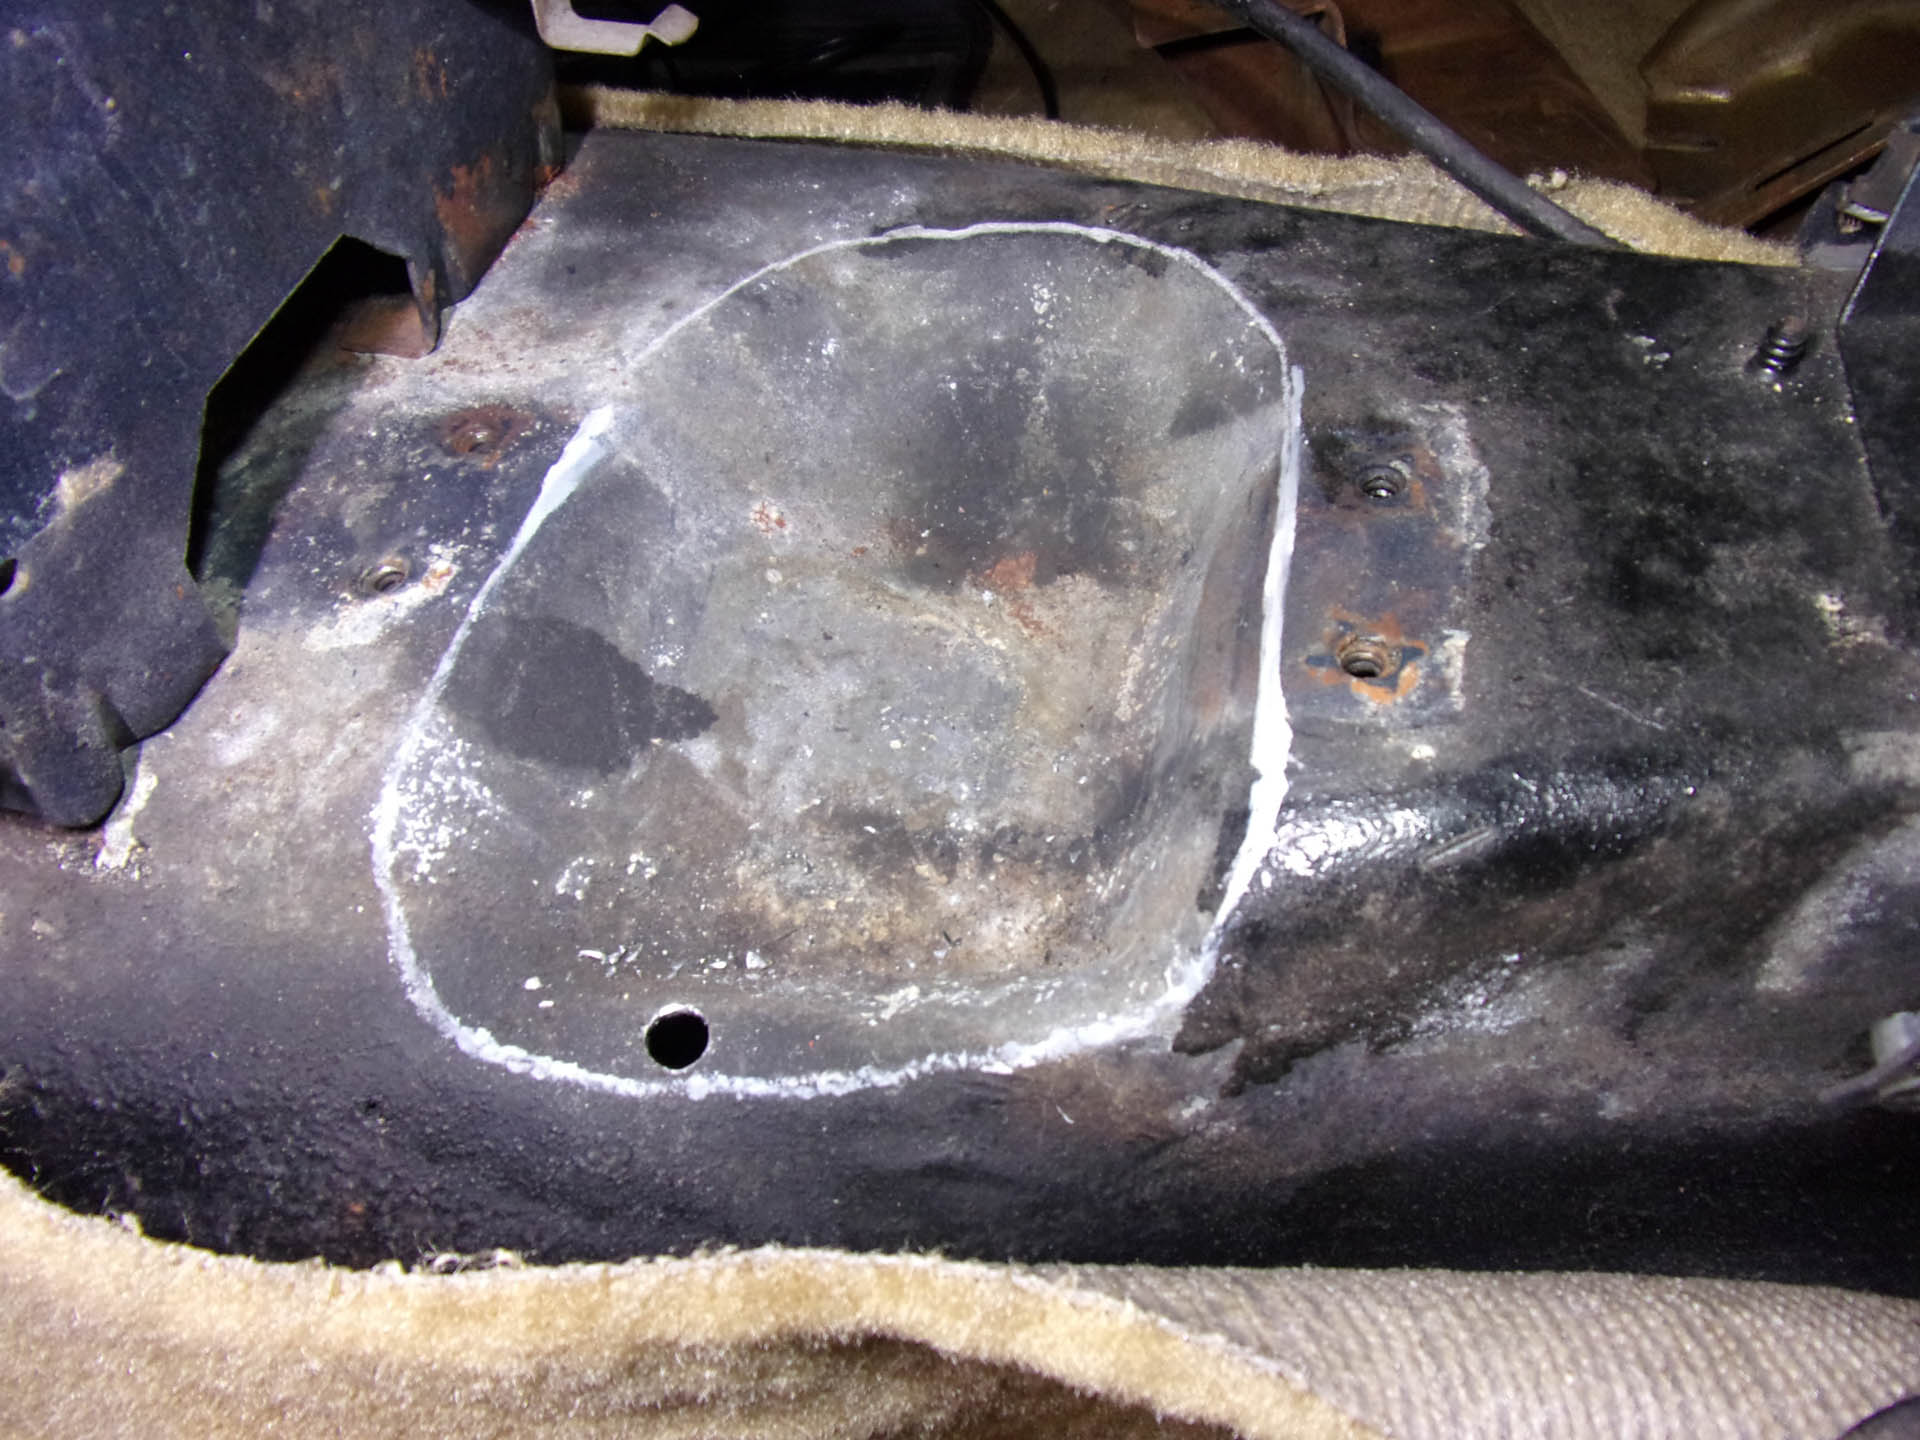
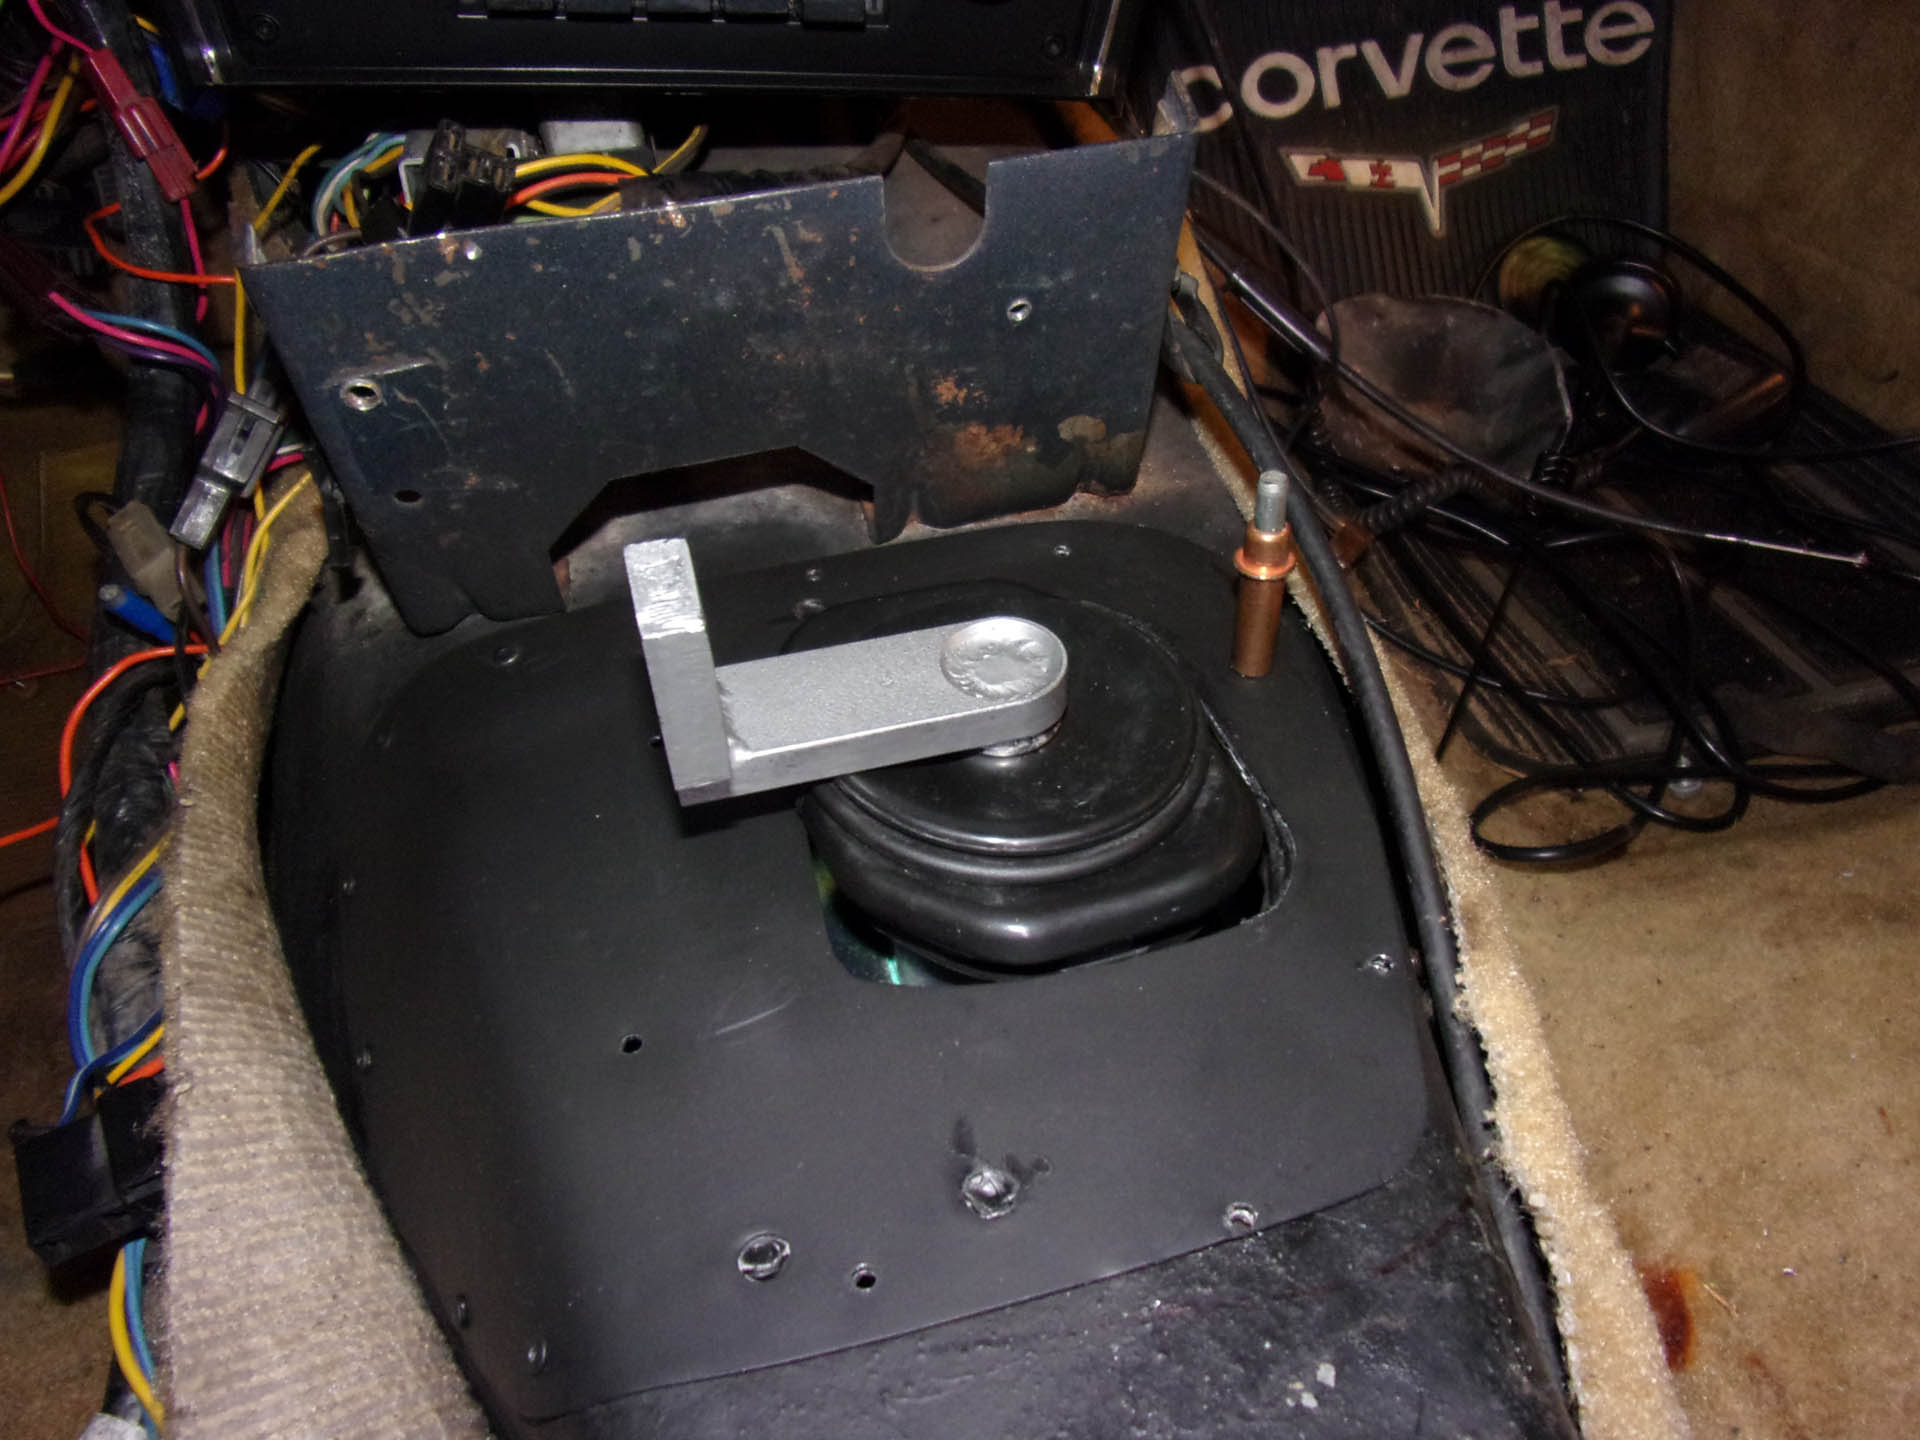
The first step was to remove the automatic transmission and accessories. SST also removed the seats to have more room to work. This is the best time to install the clutch pedal if swapping from automatic to manual, otherwise, the first step is to modify the tunnel. SST created a template for the shifter opening and thankfully the existing bolt holes make it easy to line up the template. SST’s mechanics always start by drilling a pilot hole large enough for the sawblade as an easy and clean way to start their cut.
The TREMEC T-5 is a relatively small transmission, but to give the transmission some extra clearance during installation, it’s best to remove the shifter assembly’s four bolts and then lift the shifter tower from the transmission. The transmission can also be filled with fluid at this point. TREMEC recommends three quarts of MERCON® or DEXRON II/III Multi-Purpose ATF for the break in period. Be sure the rubber plug is installed in the tail housing so that the oil doesn’t leak out.
Once the pilot bearing and flywheel are installed, the bellhousing should be checked for alignment. Silver Sport Transmissions has an easy-to-follow video on the dial indication process: https://youtu.be/fu9bg-fJdnc
Once the bellhousing is aligned, install the clutch, bellhousing, release bearing and shift fork or the hydraulic slave cylinder. If the car is a factory automatic car, the crossmember is removable. Remove it and install the transmission.
If the car was a factory manual car without a removable crossmember, there are two choices. SST has a removable crossmember kit (PN XMG-02700G) which will make future clutch changes and other maintenance jobs much easier. The second option is to follow SST’s instructions on how to maneuver the transmission into place; it requires some patience, but it will allow the factory crossmember to remain intact.
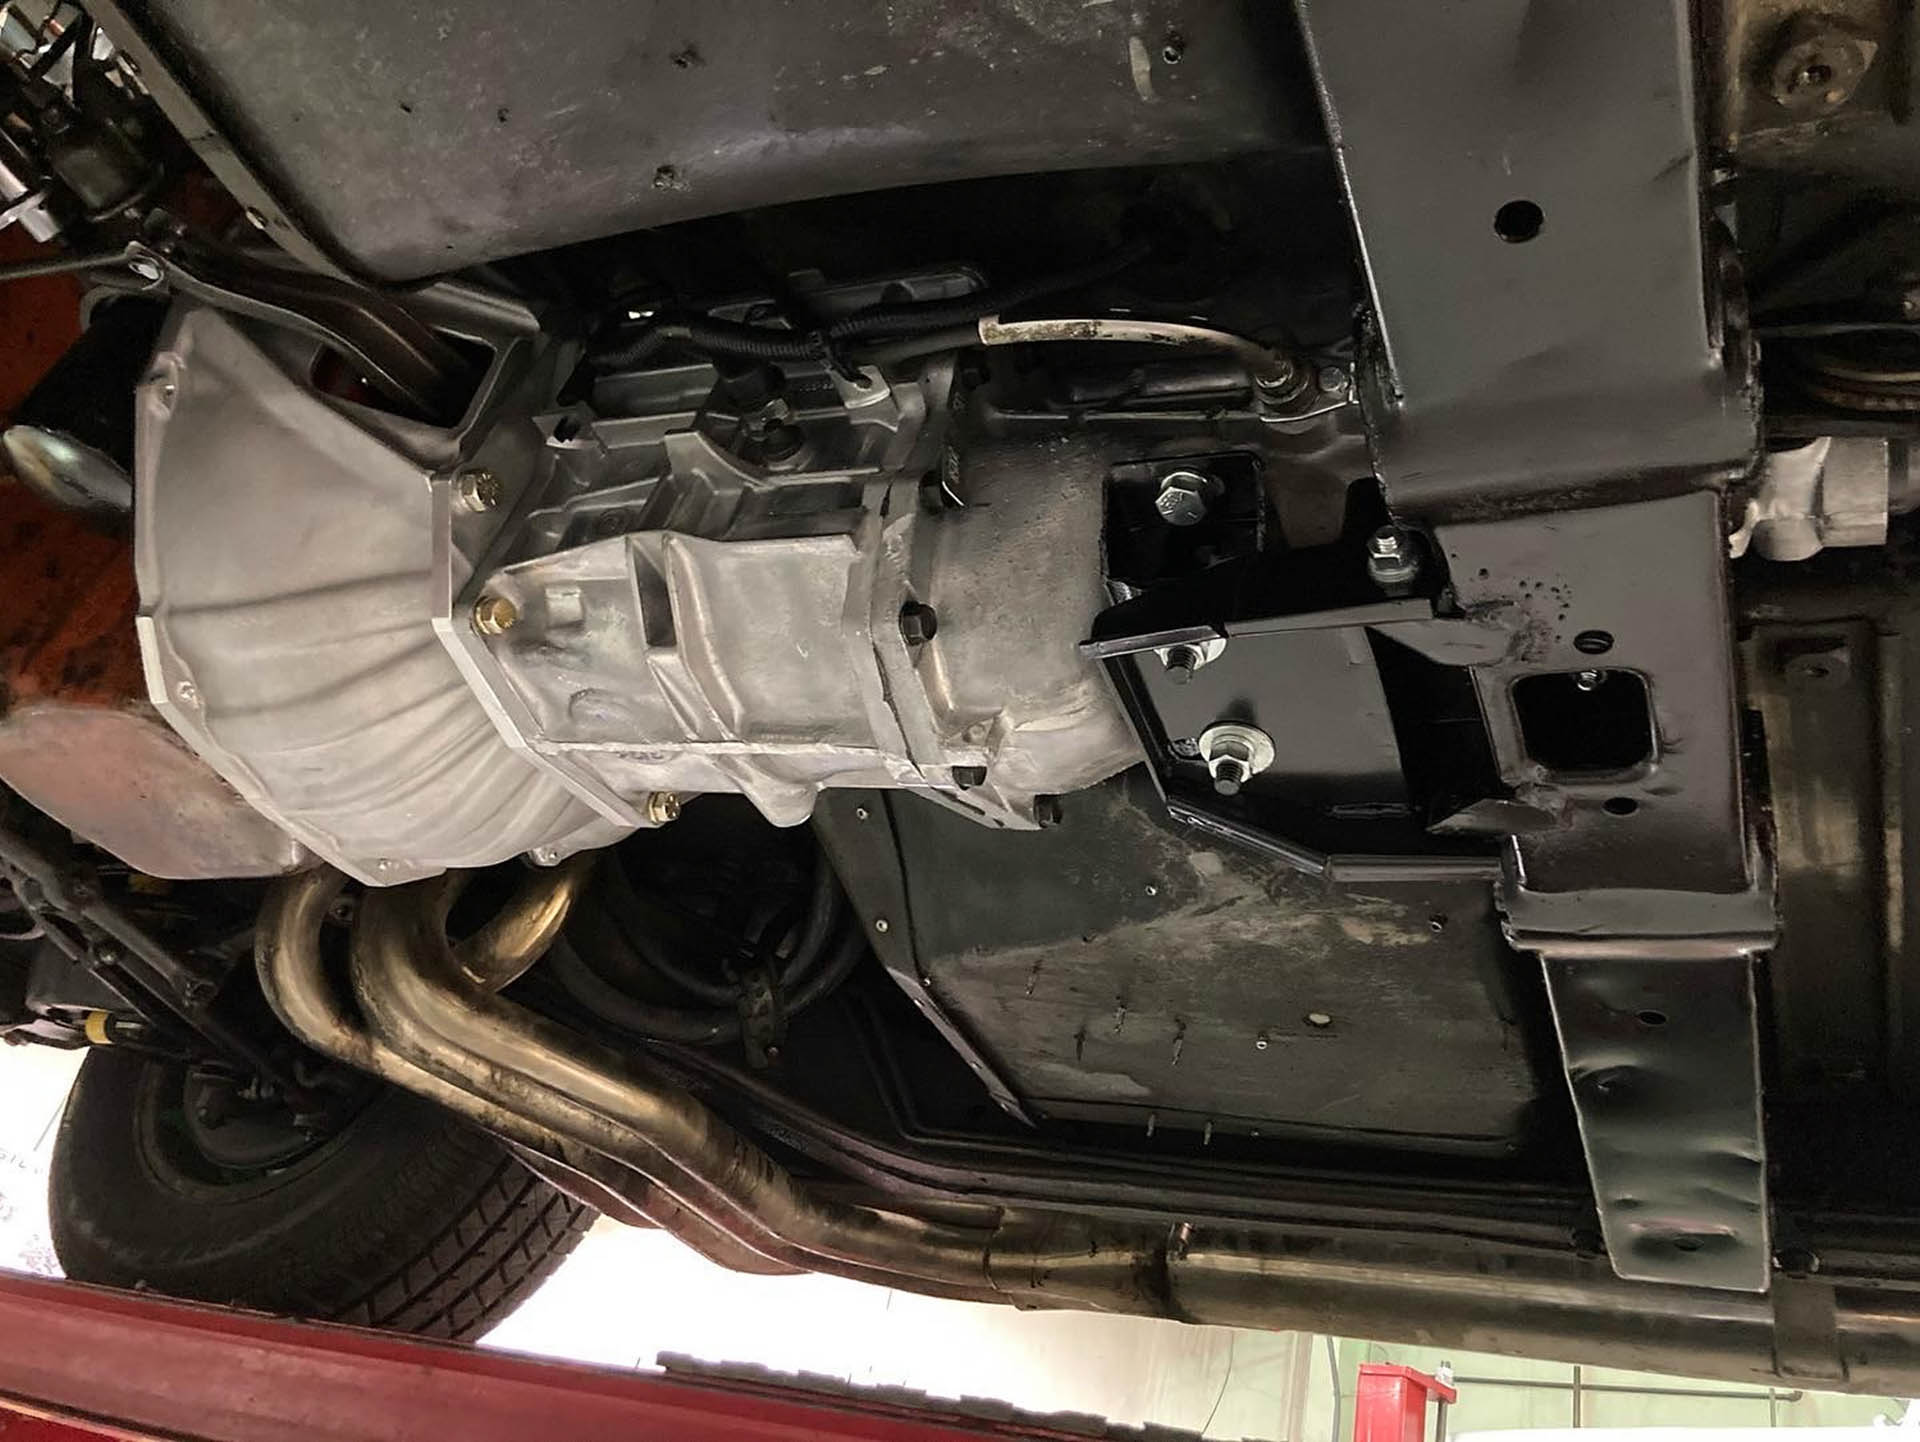
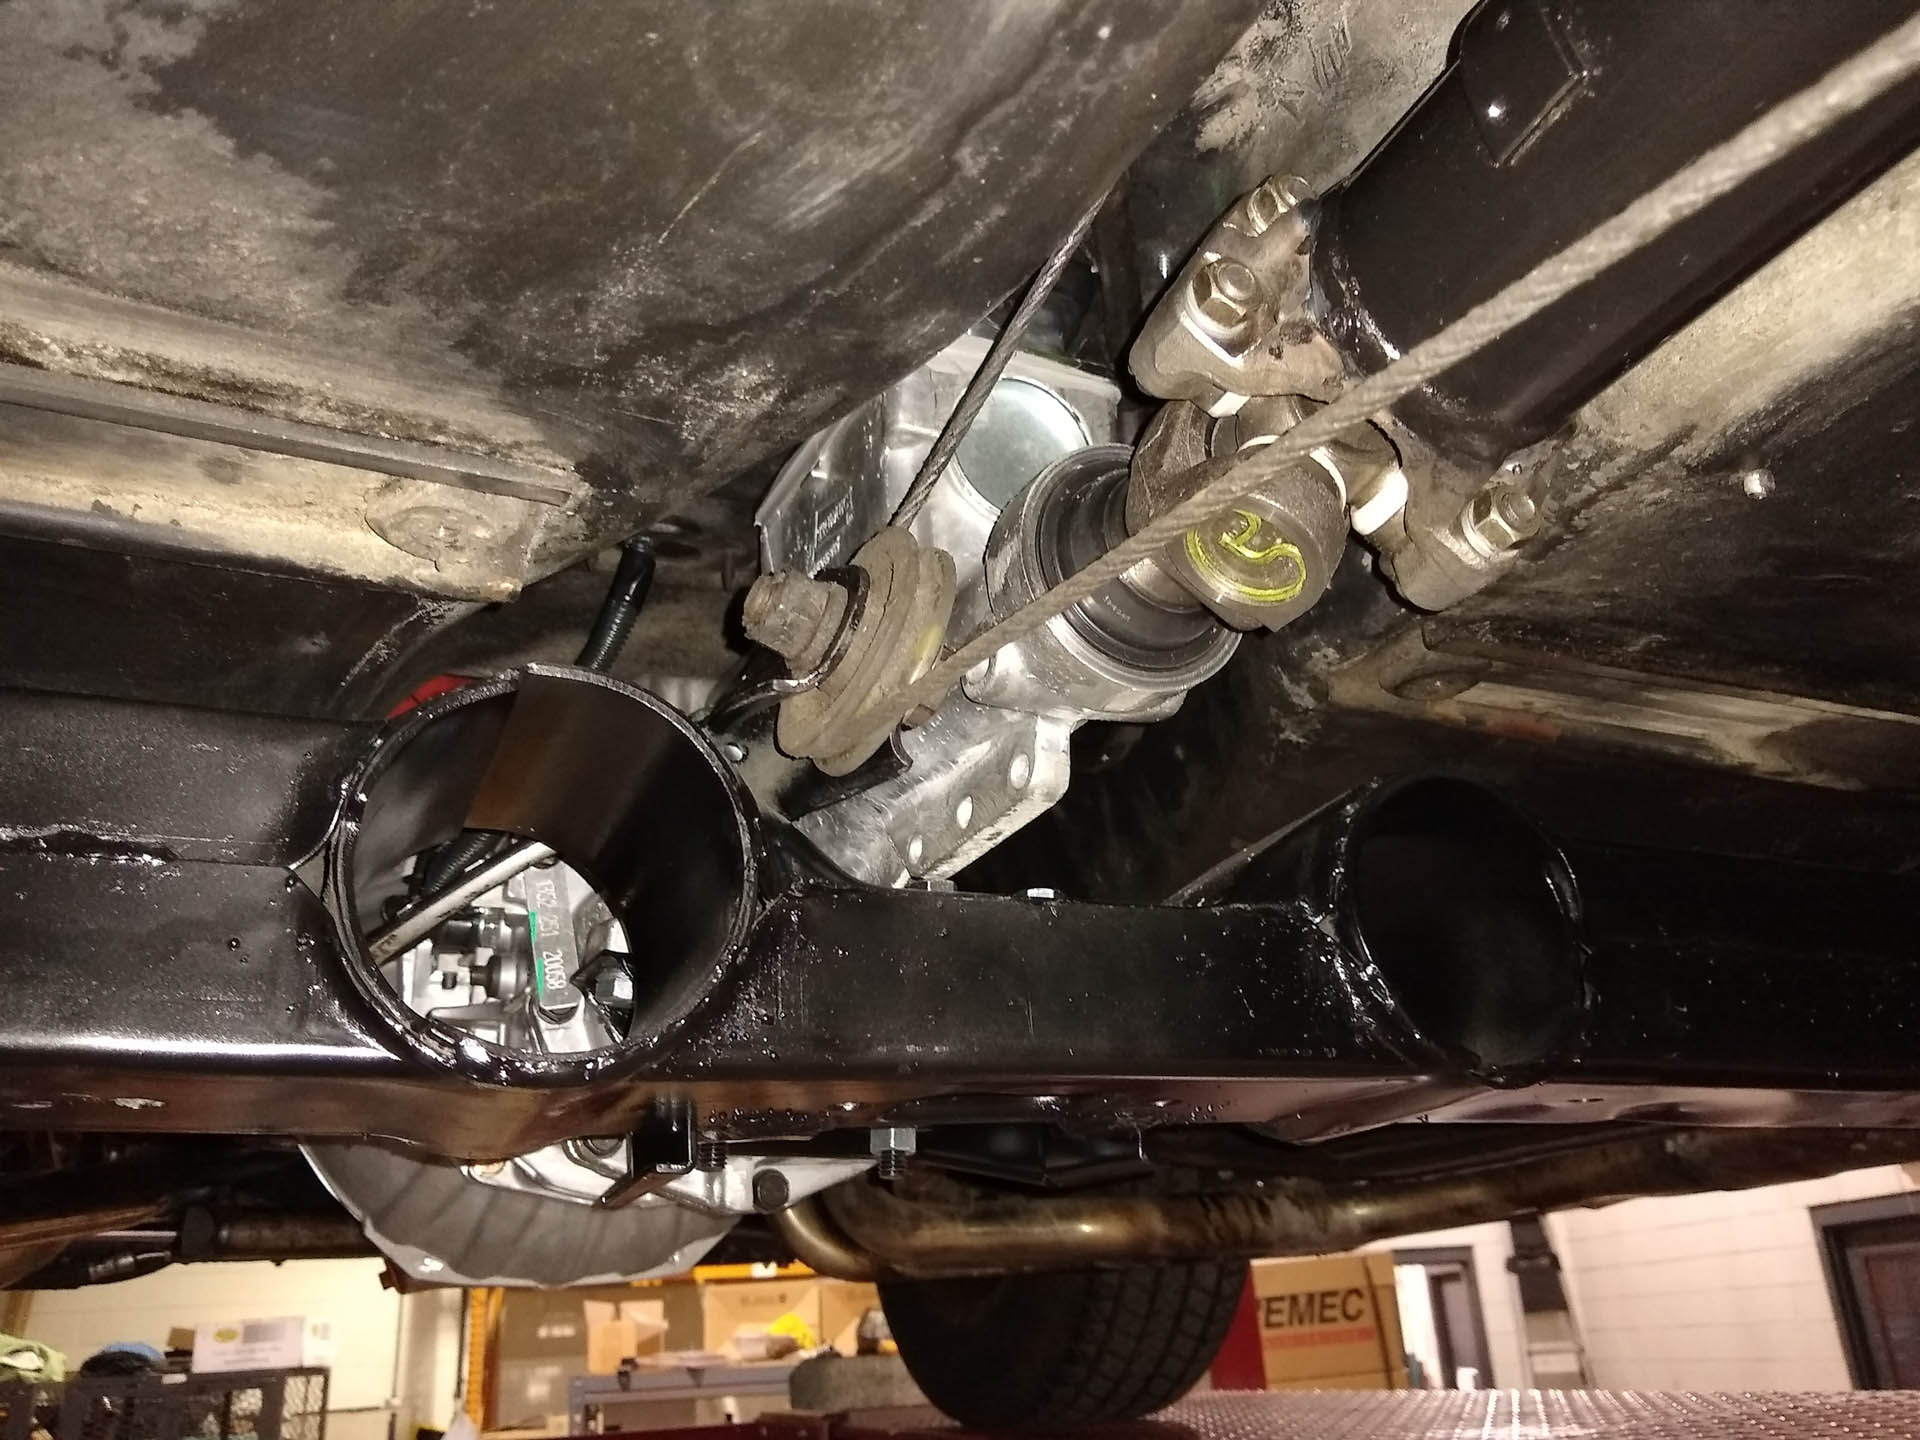
Once the transmission is installed, bolt the shifter assembly back on according to the instructions and jack the transmission up until it’s touching the tunnel. Install the transmission perch plate and if required, the optional exhaust support bracket. Bolt the transmission mount to the perch, lower the transmission, and bolt it to the isolator mount. Check the clearance of the transmission and crossmember. If something is touching the body or exhaust, it could cause a vibration or damage. Adjust as required and remember that SST’s tech line is always a call away.
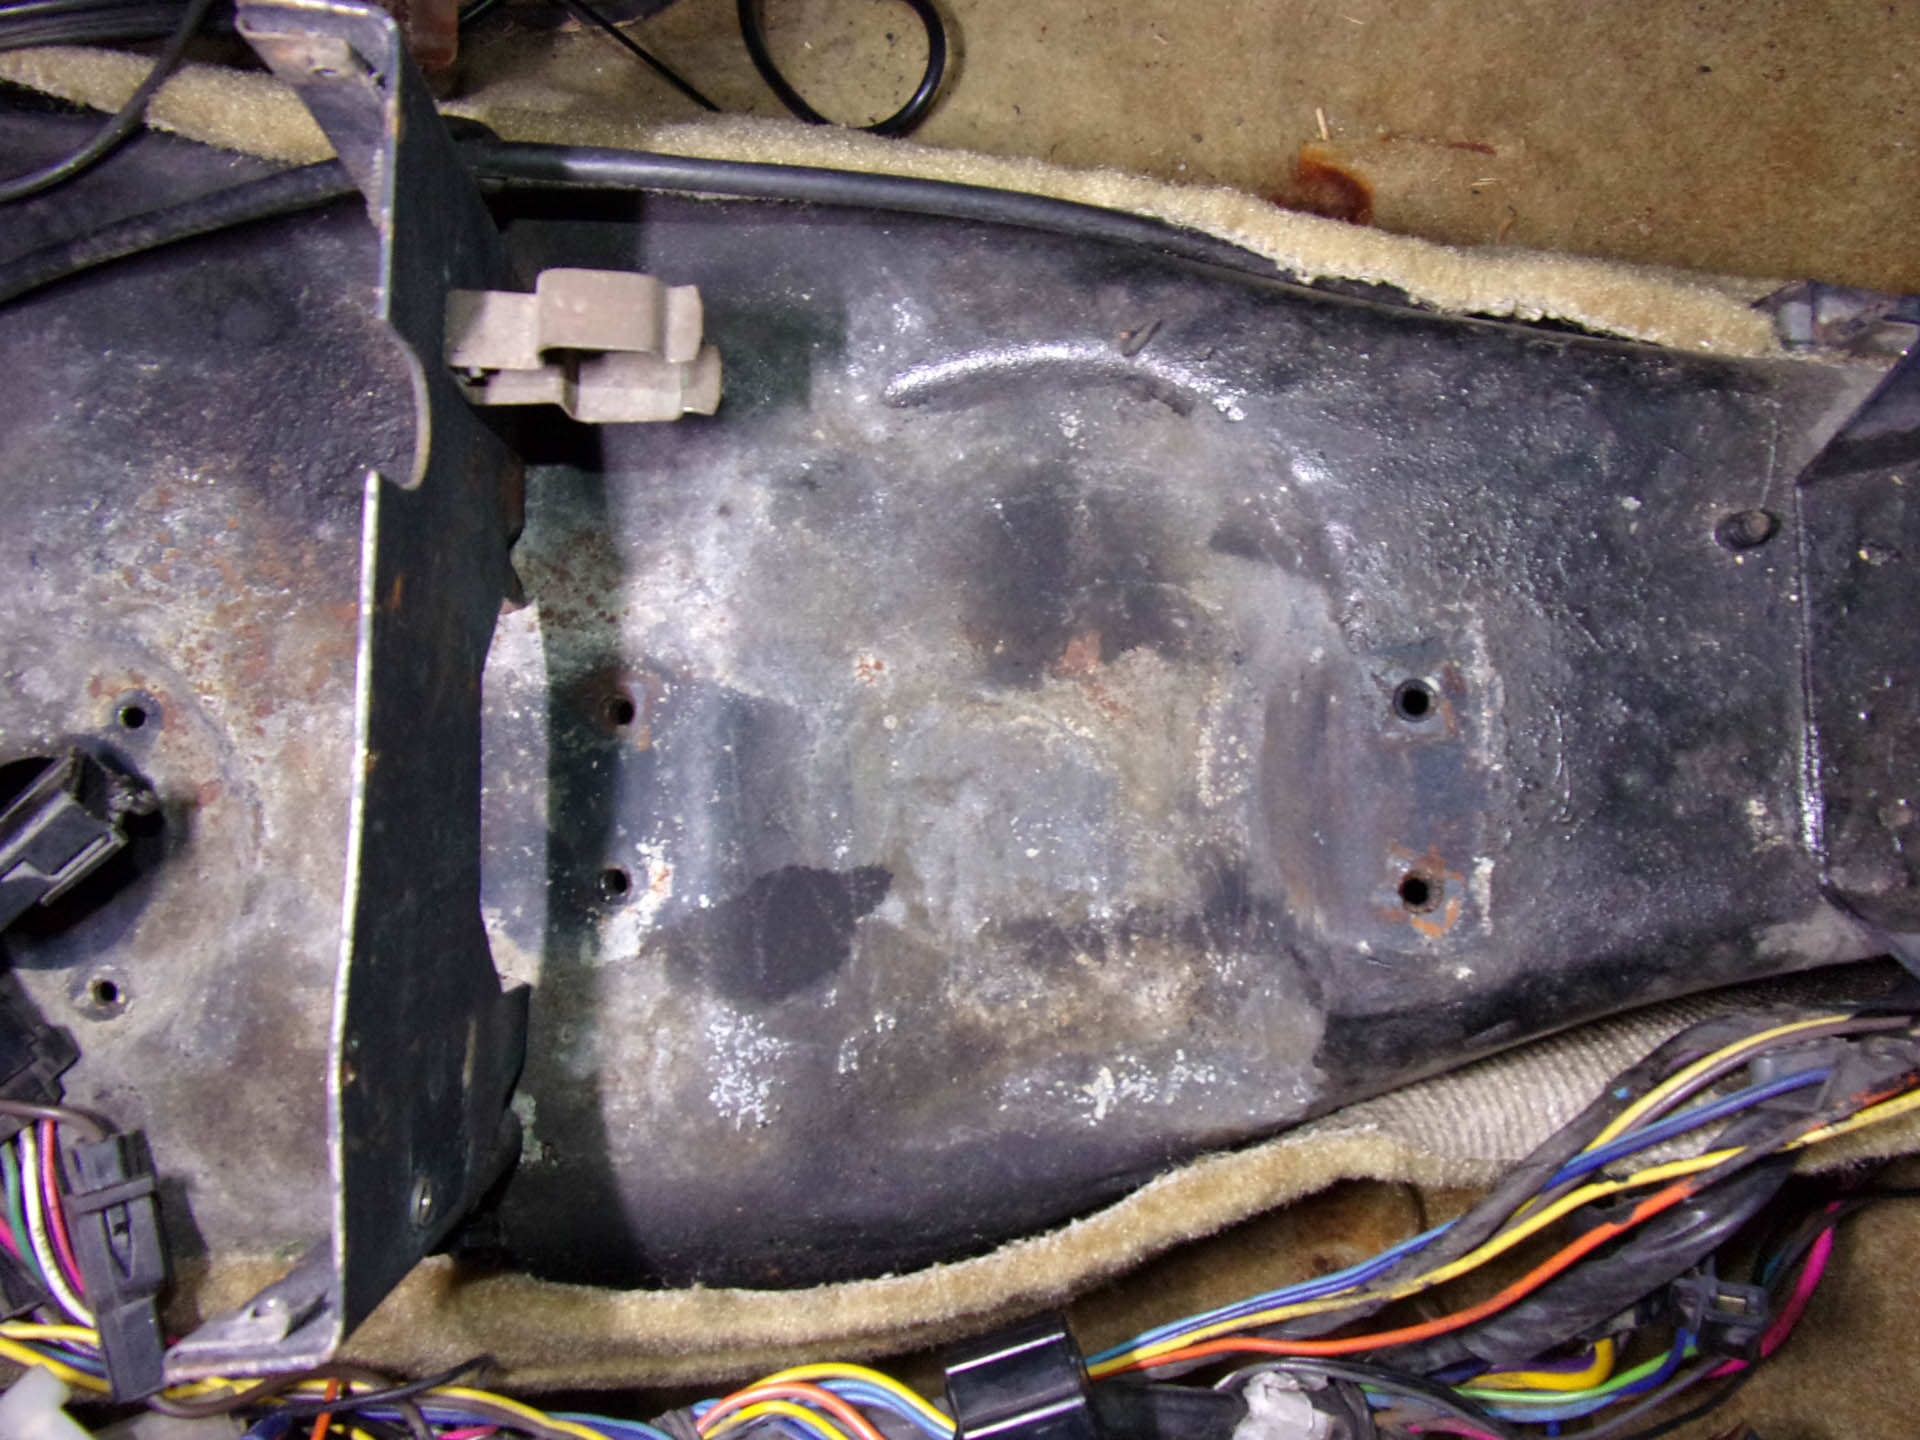
With the transmission in place, take the patch panel and line it up properly. Mark the tunnel where the panel goes then remove the transmission perch and allow the transmission to rest on the crossmember. Put the panel back into place and drill some pilot holes for the sheet metal screws and the rubber boot. Raise the transmission back into place, reinstall the perch, mechanical linkage or hydraulic kit, driveshaft, wiring, speedo cable, and any parts you may have moved for extra room like the exhaust or emergency brake cable.
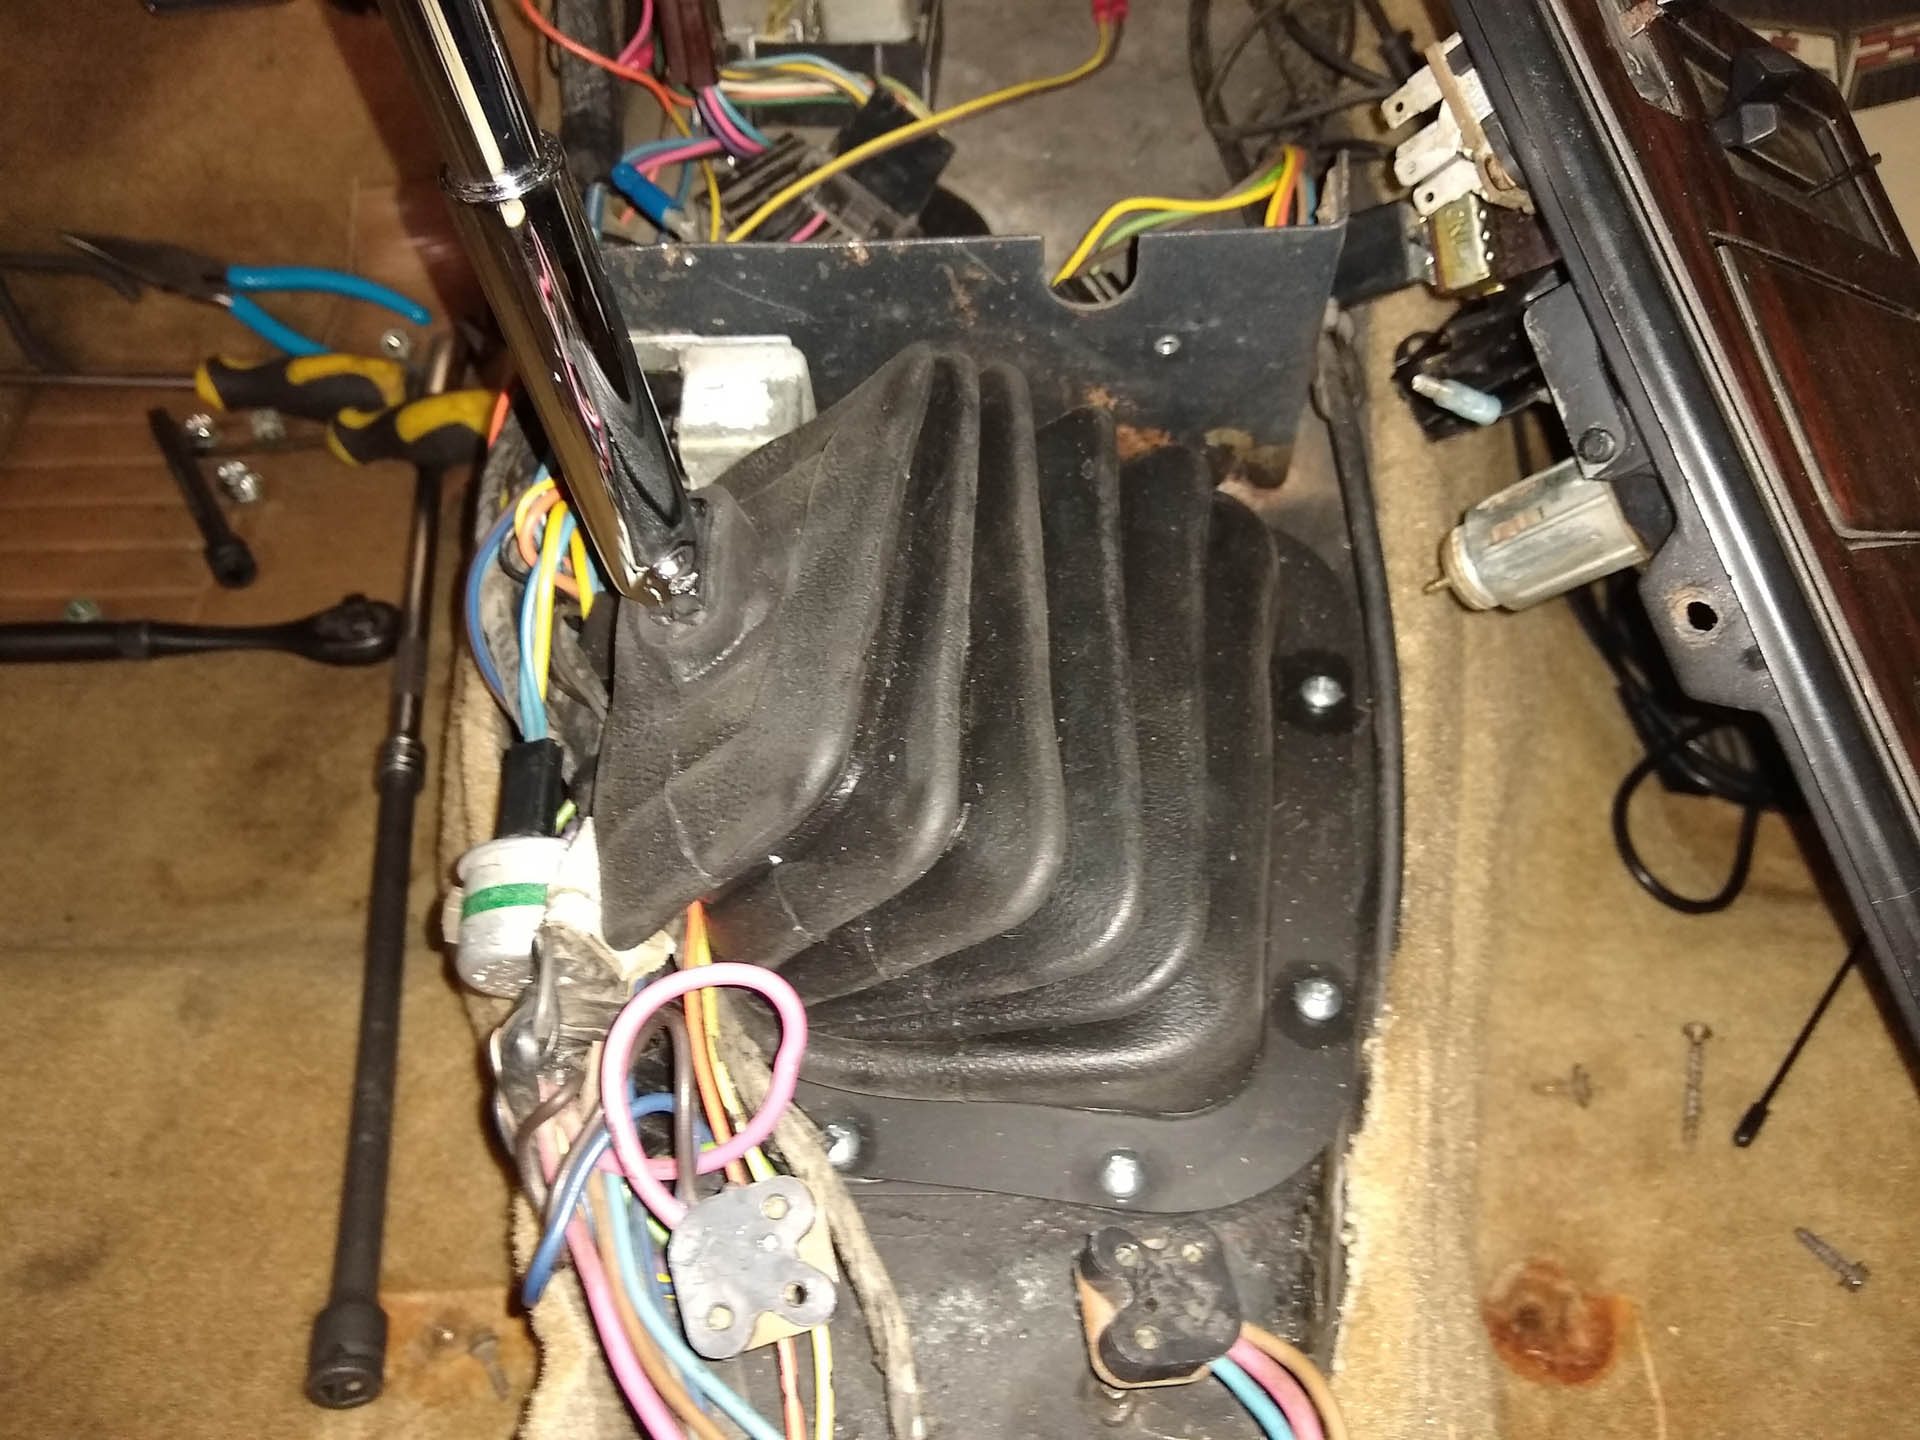
Once you’ve finished underneath the car, come back to the interior and apply a bead of Permatex Black sealant within the outline of the patch panel on the tunnel. Screw the panel into place and clean up the excessive sealant. Install the shifter handle and lower shifter boot (it will keep out dirt and water). Slide the console with the boot over the shifter and start putting the interior back together.
Silver Sport Transmissions TREMEC T-5 kit for 1968-1979 Corvettes is complete, down to the illustrated instructions. Whether you plan to install the transmission yourself or ask your favorite mechanic to take on the job, the instructions, complete kit, and tech help phone line make the installation as painless as possible.
For more information about the kit and to get a quote, call Silver Sport Transmissions: 888-609-8187.
By Evan J. Smith
The TREMEC T-5 originally came as OE equipment in Foxbody Mustangs and was a popular overdrive transmission for years in many swap applications. When TREMEC introduced it to the aftermarket, it became an easy choice for early Mustangs with moderate power levels.
The T-5 only has one shifter position, a 10-spline input shaft, and a Ford bellhousing bolt pattern—because of this, the T-5 wasn’t a viable option for other makes or models. While TREMEC’s new 5-speed, the TKX, is highly versatile and a great transmission for a wide range of applications, it’s also more expensive than the T-5.
Silver Sport Transmissions (SST), known for its PerfectFit™ TREMEC transmission kits, tasked the in-house engineering team to create a T-5 kit for 1968-1979 Chevrolet Corvettes to give owners a second, more affordable option for an overdrive 5-speed transmission.
SST’s engineering team started with the library of information they already have on the Corvette and the TREMEC T-5 to determine where the T-5’s shifter position would need to be. With computer models complete, SST built the first TREMEC T-5 with a Corvette STX Shifter® and a transmission perch plate to rest the transmission on the stock crossmember. SST sourced a 1979 Corvette to serve as a research and development vehicle.
The ’79 Stingray used for this exercise came equipped with an automatic transmission and the plan was to retain the factory console by replacing the automatic gear indicator with a new 5-speed shift plate that is designed to resemble the original 4-speed shift plate.
A replica manual shifter handle will replace the automatic shifter handle. The only hint that a major performance upgrade has taken place will be the extra digit on the shift plate, otherwise the car will look completely stock.
The first step was to remove the automatic transmission and accessories. SST also removed the seats to have more room to work. This is the best time to install the clutch pedal if swapping from automatic to manual, otherwise, the first step is to modify the tunnel. SST created a template for the shifter opening and thankfully the existing bolt holes make it easy to line up the template. SST’s mechanics always start by drilling a pilot hole large enough for the sawblade as an easy and clean way to start their cut.
The TREMEC T-5 is a relatively small transmission, but to give the transmission some extra clearance during installation, it’s best to remove the shifter assembly’s four bolts and then lift the shifter tower from the transmission. The transmission can also be filled with fluid at this point. TREMEC recommends three quarts of MERCON® or DEXRON II/III Multi-Purpose ATF for the break in period. Be sure the rubber plug is installed in the tail housing so that the oil doesn’t leak out.
Once the pilot bearing and flywheel are installed, the bellhousing should be checked for alignment. Silver Sport Transmissions has an easy-to-follow video on the dial indication process: https://youtu.be/fu9bg-fJdnc
Once the bellhousing is aligned, install the clutch, bellhousing, release bearing and shift fork or the hydraulic slave cylinder. If the car is a factory automatic car, the crossmember is removable. Remove it and install the transmission.
If the car was a factory manual car without a removable crossmember, there are two choices. SST has a removable crossmember kit (PN XMG-02700G) which will make future clutch changes and other maintenance jobs much easier. The second option is to follow SST’s instructions on how to maneuver the transmission into place; it requires some patience, but it will allow the factory crossmember to remain intact.
Once the transmission is installed, bolt the shifter assembly back on according to the instructions and jack the transmission up until it’s touching the tunnel. Install the transmission perch plate and if required, the optional exhaust support bracket. Bolt the transmission mount to the perch, lower the transmission, and bolt it to the isolator mount. Check the clearance of the transmission and crossmember. If something is touching the body or exhaust, it could cause a vibration or damage. Adjust as required and remember that SST’s tech line is always a call away.
With the transmission in place, take the patch panel and line it up properly. Mark the tunnel where the panel goes then remove the transmission perch and allow the transmission to rest on the crossmember. Put the panel back into place and drill some pilot holes for the sheet metal screws and the rubber boot. Raise the transmission back into place, reinstall the perch, mechanical linkage or hydraulic kit, driveshaft, wiring, speedo cable, and any parts you may have moved for extra room like the exhaust or emergency brake cable.
Once you’ve finished underneath the car, come back to the interior and apply a bead of Permatex Black sealant within the outline of the patch panel on the tunnel. Screw the panel into place and clean up the excessive sealant. Install the shifter handle and lower shifter boot (it will keep out dirt and water). Slide the console with the boot over the shifter and start putting the interior back together.
Silver Sport Transmissions TREMEC T-5 kit for 1968-1979 Corvettes is complete, down to the illustrated instructions. Whether you plan to install the transmission yourself or ask your favorite mechanic to take on the job, the instructions, complete kit, and tech help phone line make the installation as painless as possible.
For more information about the kit and to get a quote, call Silver Sport Transmissions: 888-609-8187.